Sewing: Repurpose, Up-cycle and Repair!

I love re-purposing things into something else, and starting with something that is already a finished product can save you loads of time! Take these sweet little bathrobes made for my sweet little grandchildren!

Terry Robes from Towels

When I couldn't find nice terry on the bolt (Really? I own a fabric store! No terry in stock!) I resorted to the softest terry towels I could find. I  found both a blue and a white that were large enough to make robes for Bear and Ollie. When I laid everything out on the cutting table I discovered that I could take advantage of the finished edges by laying the pattern pieces at the edges of the towel, allowing for facings and hems to be disregarded.

Layout of pattern piece on the edge of the towel.

See how the robe front piece is placed over the edge of the towel? The facing fold line is right on the finished edge, as is the actual hem line, which means I won't have to face or hem the edges! (I used Simplicity 8224.)

Robe layout.

You can see in the above photo that the sleeve and back pieces are also laid with the actual hem line at the edges, so no hemming anywhere!

Finished Robes made from Terry Towels

Finished in record time! Complete with a little belt, simply serged around all edges and attached at center back so it will never be lost!

Repurposed Sweater

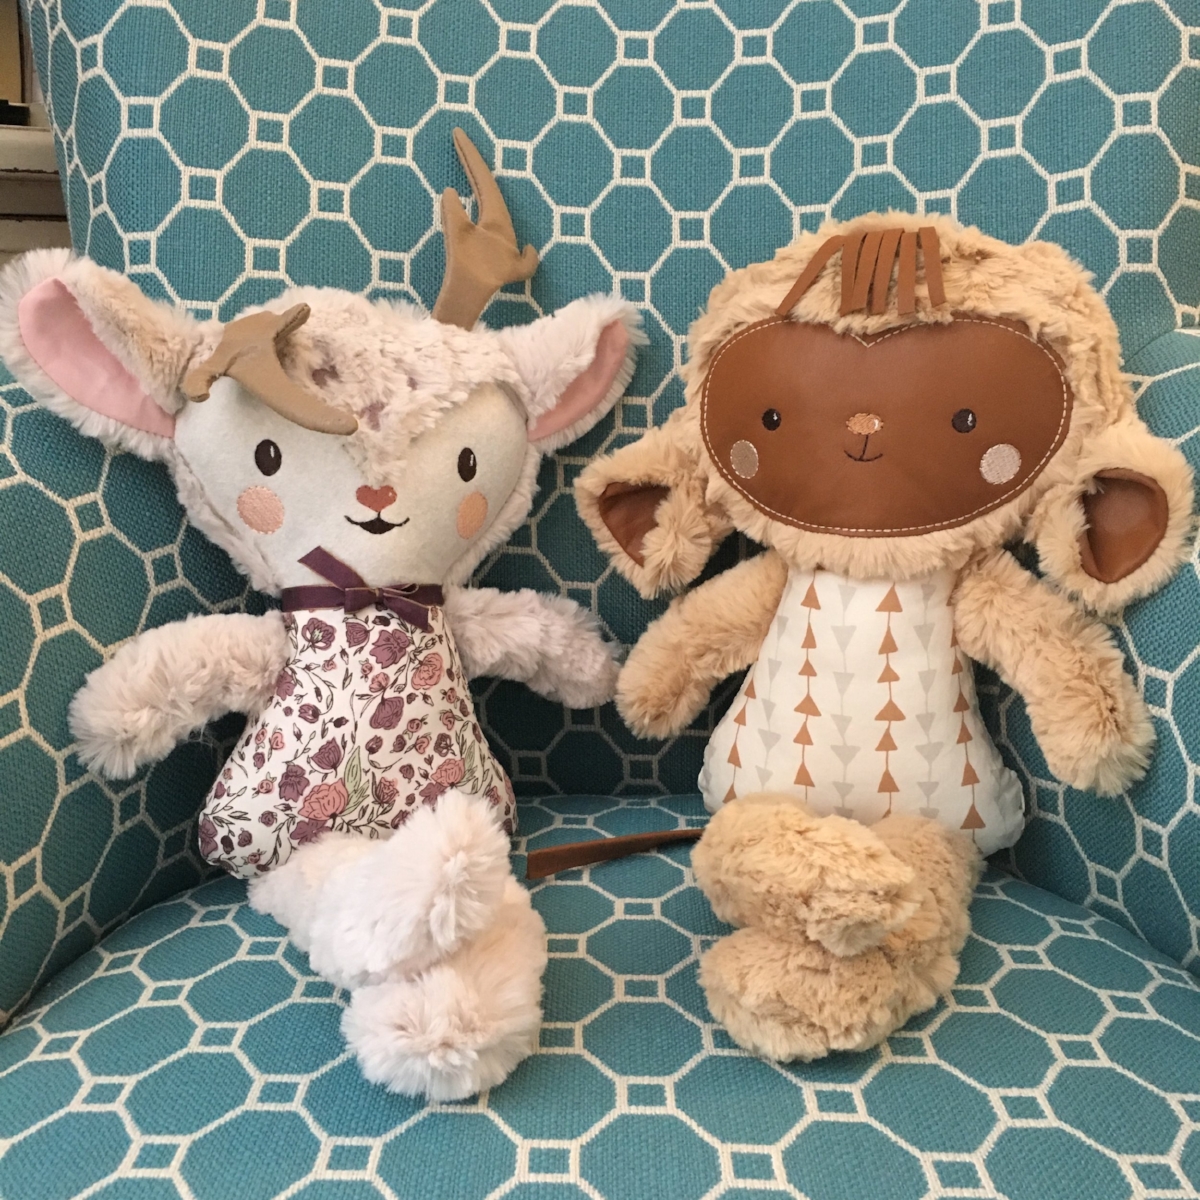
And then there was this not-so-foxy sweater. It was a great sweater, but didn't fit me well. I hated to let go of it, so I repurposed it for Bear! I used the very same method of slipping the pattern pieces over the finished edges so that I didn't have to hem the sleeves or the lower edge. He loved it so much Bonnie could hardly get it him out of it for bedtime!

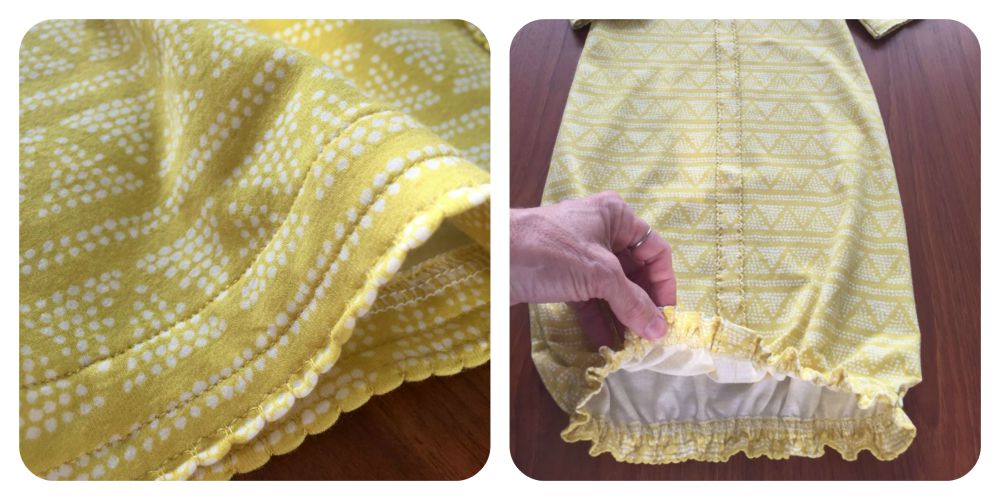
One more project...one of my daughter's beloved shirts sadly acquired a stain on a pocket. After 3 different stain removers didn't do the job, our last resort was bleach, which took the stain out along with the dye in the fabric. The stain was now replaced with a white spot! Removing the pocket was out of the question because the spot went through to the shirt front.

Shirt with stained pocket.

The back of the shirt has a lace yoke, so I decided I might be able to cover the pocket with lace. From my stockpile of old doilies, I found a beautiful lace runner that blended nicely. Placing the pocket underneath, I cut out a piece large enough to cover all four sides. Note that, once again, I let the finished edge help me along the bottom of the pocket! A fabric glue stick held all the edges in place for pinning and sewing it back in its original locale on the front of the shirt. Note: the top of the pocket is larger than the bottom to allow for an open, relaxed look. I re-attached it over the original stitching in the square shape to allow for the same finished look. Click on the pictures below to enlarge for detail.

Lace pocket

What do you think? No need to throw something out just because of a stain or ill fit! And you can repurpose things to be completely different things by using a little imagination!

Happy sewing and thanks for visiting! God bless! Maxie

Furry Friends Finished!

I making good on my promise to share these furry friends after they were given away as birthday gifts to my two grandchildren, Bear and Ollie! They were so much fun to make as 'in the hoop' projects by Dolls and Daydreams. I used dreamy cuddly fabric from EE Schenck, which was wonderful to work with!

These little critters are big! I used the 8 x 12 hoop, but Dolls and Daydreams includes sizes for smaller hoops in the file. My finished size, head to toe, is about 17".

Dolls and Daydreams In the Hoop Stuffed Toys
Big Caribou Reindeer by Dolls and Daydreams

As every part laid in place my smile grew bigger and bigger! This one is for Ollie Doe, my granddaughter, and her fabric body is from Bonnie Christine's line, "Hello, Ollie" for Art Gallery Fabrics. Of course, the fabric on Bear's Monkey is from "Hello, Bear"! What else would a grandmother do?

Tips on making stuffed toys in the hoop?

  • Keep tape handy for holding things in place. I used masking tape, but painter's tape and even scotch tape work well.
  • Cut furry fabrics outside and shake them well before bringing to the embroidery machine. You don't want all that fuzz to make its way down inside your machine.
  • When you've got all the limbs and ears, etc., assembled onto the hoop, tape them in place well so that they don't shift during stitching. Place tape on the stitching line because it helps the embroidery foot to glide up and over bulky parts.
  • For the last stitching (with the body back placed face down over everything) cover the whole piece with sticky tear-away stabilizer. This prevents the embroidery foot from getting caught against a stuffed limb as it moves around the hoop. It easily tears away after your finished. See below.
  • See the previous post for a short video on making the limbs.
  • Keep a sweet dog close by.
Dolls and Daydreams In the Hoop Stuffed Toys

Be sure to check out Dolls and Daydreams In the Hoop projects, as well as their sewing projects. Her instructions are great and her designs always stitch up beautifully!

Thanks for visiting! Happy sewing and God bless! Maxie

Sewing with Knit and the Shell Tuck Edge Stitch

It's about time I turned out some baby clothes, don't you think? Grandaughter #1 is due in about 2 weeks! Thankfully, my Baby Lock Serger and Sewing Machines help me make haste, while making me look good at the same time! So today, I'm sharing a wonderfully fun technique that gives special detail when special is called for! I'll be using Bonnie Christine's knit fabric for Art Galley Fabrics, and the Celebrating Baby Newborn Gown patten that you can download free from Rachel at  Stitched-Together.com. Bonnie also has knits for her Hello, Bear line and her Winged line; if you love Art Gallery's pima cotton prints, you're sure to love their luxurious knits!

Stitched-Together Baby Gown

Notice the sweet edging stitched along the hems of the sleeves and down the front of the 'pleat' on the front of the gown. It's called the Shell Tuck Edge, and it's done completely by machine! If you have a machine with assorted stitches, it's very likely there. Read on and see!

Shell Stitched Edge

The first thing you need to do is to hop over and download the pattern from Stitched-Together.com. The front accent is not part of the pattern, but easily made by moving the pattern off the fold 3/4", as shown below. By the way, do you use pattern weights? I love to use these that were gifted to me from Sarah Overton; you can make your own from the instructions over at Tea Rose Home.

gown front from Stitched-Together.com

Cut out your gown front, and while the pattern is still in place on the fabric, draw a line right next to the pattern piece (3/4" off the fold) with an iron-off marker. With the fabric still folded wrong sides together, put a few pins in the fold and stitch on this line. This will create a little tube on the front center. Press it flat, centering the tube over the seam, as shown in the photos below.

gown front

Fold the gown front wrong sides together, so that one side of the folded edge is extended. We will create the Shell Tuck Edge on both folded edges, working with one side at a time.

folded gown front

The next step is to set up the stitch on the machine. The picture below shows my Baby Lock Destiny's screen. The Shell Tuck Edge is stitch "Q-13" (highlighted in blue, below). It looks somewhat like a blanket stitch with three straight stitches between the right-swing jumps. Notice the width and length settings that I've adjusted to suit my knit fabric. Play around with your settings on scraps of your actual fabric and make adjustments to your liking. One more thing to note on the screen below: The Destiny has a built in camera that will allow you to view your actual fabric under the presser foot with a superimposed image of the chosen stitch, in actual size. This allows me to adjust my fabric precisely, and to see how the stitch will fall in place. Thank you, Baby Lock! You can see in the camera image that I am allowing the right-swing jump to fall off the folded edge of the fabric, with the stitch landing in the air. This is exactly what I want to happen because the thread will grab the fold and pull it over, creating a little scalloped edge! Note: this stitch is beautiful on woven cotton fabrics, too, especially when the fold is on the bias grain.

Using the Shell Tuck Edge Stitch on Baby Lock Destiny.
Shell Tuck Edge Stitch on Baby Lock Destiny

Beautiful, right? Imagine this stitch on other things. For example, how about on the folded edge of a 1.5" bias woven cotton strip for a beautiful piping insertion that would be wonderful slipped under a quilt binding edge!

Celebrate Baby Gown front

With the first side of the front accent completed, fold the gown wrong sides together once again to expose the opposite side of the folded center tube. Repeat the Shell Tuck Edge for this side.

Continue to sew the little gown as directed in the pattern. I made a couple of changes to my version. First, instead of binding the neck edge, I folded the strips in half lengthwise and serged them to the neck edge with my Enlighten serger. (This serger threads itself, by the way!) This method is much faster and gives a nice smooth finish in one step.

Baby Gown Neck Edge

The second change was to use the Shell Tuck Edge stitch on the lower hem, shown below, and sleeve edges as a finish.

Baby Gown Hem

I hope you'll give the Shell Tuck Edge stitch a try! I'm sure you'll find lots of places to apply it's delicate touch!

Thanks for visiting! Happy Sewing and God bless! Maxie

Sewing and Photography

We are creatives, you and I. Chances are you love a wide variety of creative forms. I've always loved sewing as my main element, but along the way I add other things to the growing list of things I love to do. And it's not really that I just add something to my list; it's that I fulfill a desire that has been growing in my heart for a while.

So, last year I bought a camera and took a photography course at our local community college. I loved it so much that I took a second course! There is so much to learn, and I have to be ok with being a novice, at least for a little while longer. I've taken several great online classes, too, and a little more takes hold with every lesson. So, I thought I'd share a few photos with you, and also encourage you to check out your local community college and the personal enrichment classes offered! I teach quilting at this same college...you just might find a new niche!

Note: please stop by tomorrow for a special blog post! It's my turn for the Bonnie Christine Ribbon Blog Tour!

Orchid
White Orchid
Bradford Pear Trees
Begonia
Purple Orchid
Strange Red Flower
Purple Orchid
Flower
Daffodil
Blue Hydrangeas
Biltmore House
Biltmore Gardens

Yep, I went to the Biltmore House in Asheville, NC yesterday! You should make the trip one day!

Thanks for visiting! Hope to see you tomorrow. Happy Sewing and God bless, Maxie


Â