
It's about time I turned out some baby clothes, don't you think? Grandaughter #1 is due in about 2 weeks! Thankfully, my Baby Lock Serger and Sewing Machines help me make haste, while making me look good at the same time! So today, I'm sharing a wonderfully fun technique that gives special detail when special is called for! I'll be using Bonnie Christine's knit fabric for Art Galley Fabrics, and the Celebrating Baby Newborn Gown patten that you can download free from Rachel at Stitched-Together.com. Bonnie also has knits for her Hello, Bear line and her Winged line; if you love Art Gallery's pima cotton prints, you're sure to love their luxurious knits!

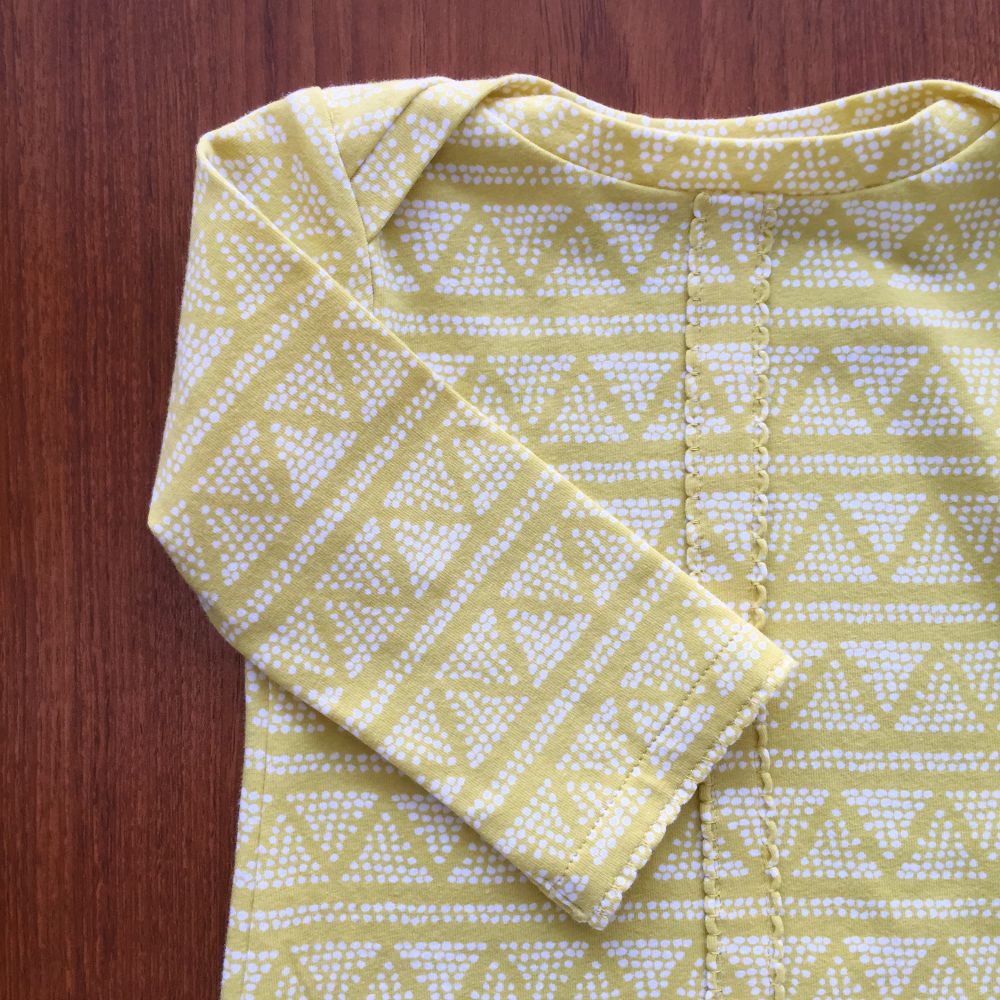
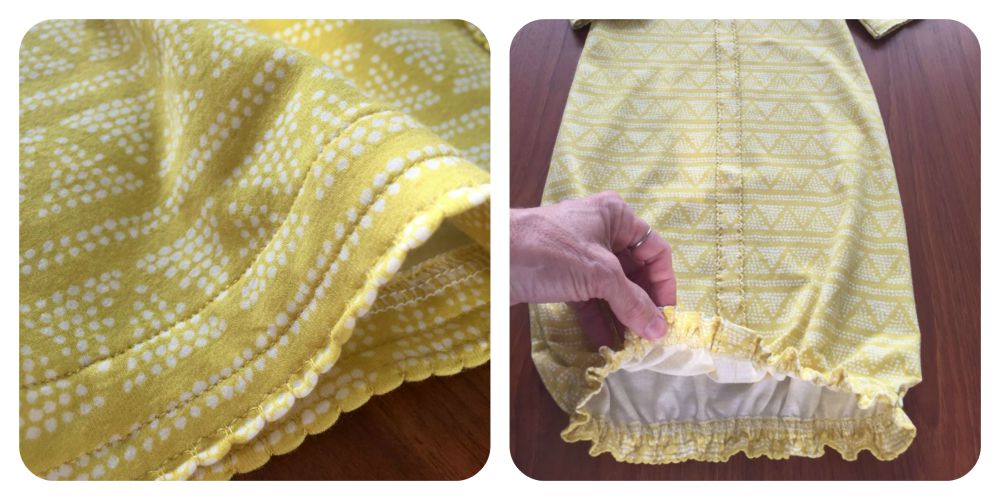
Notice the sweet edging stitched along the hems of the sleeves and down the front of the 'pleat' on the front of the gown. It's called the Shell Tuck Edge, and it's done completely by machine! If you have a machine with assorted stitches, it's very likely there. Read on and see!
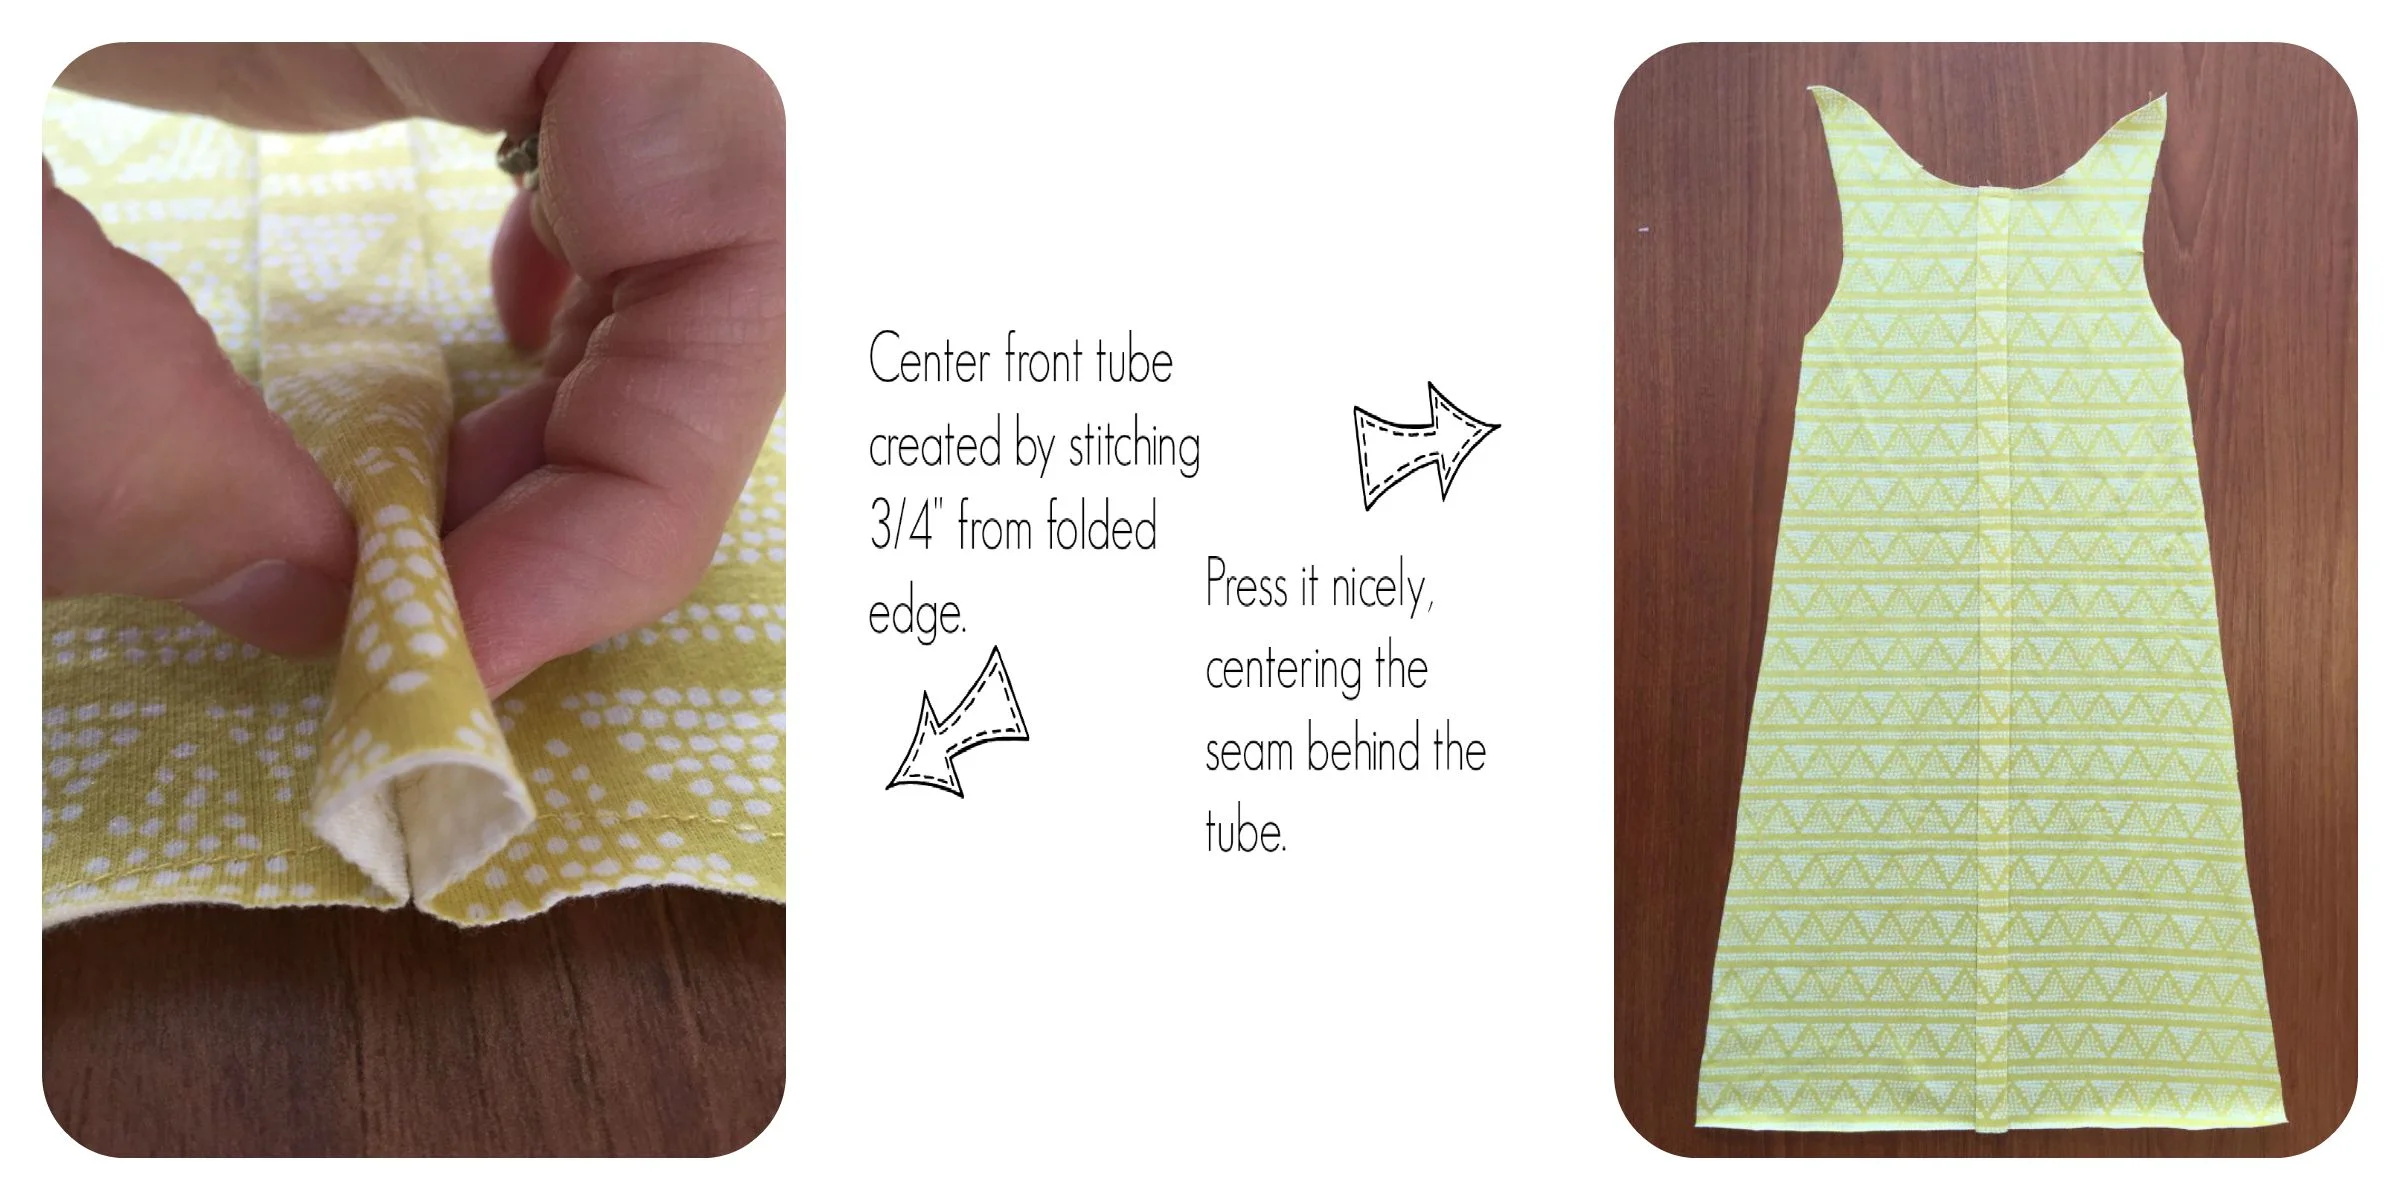
The first thing you need to do is to hop over and download the pattern from Stitched-Together.com. The front accent is not part of the pattern, but easily made by moving the pattern off the fold 3/4", as shown below. By the way, do you use pattern weights? I love to use these that were gifted to me from Sarah Overton; you can make your own from the instructions over at Tea Rose Home.

Cut out your gown front, and while the pattern is still in place on the fabric, draw a line right next to the pattern piece (3/4" off the fold) with an iron-off marker. With the fabric still folded wrong sides together, put a few pins in the fold and stitch on this line. This will create a little tube on the front center. Press it flat, centering the tube over the seam, as shown in the photos below.
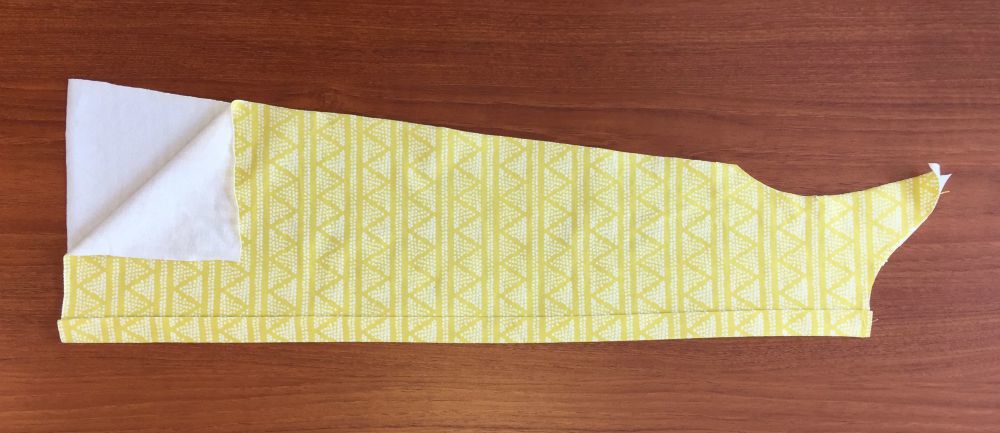
Fold the gown front wrong sides together, so that one side of the folded edge is extended. We will create the Shell Tuck Edge on both folded edges, working with one side at a time.
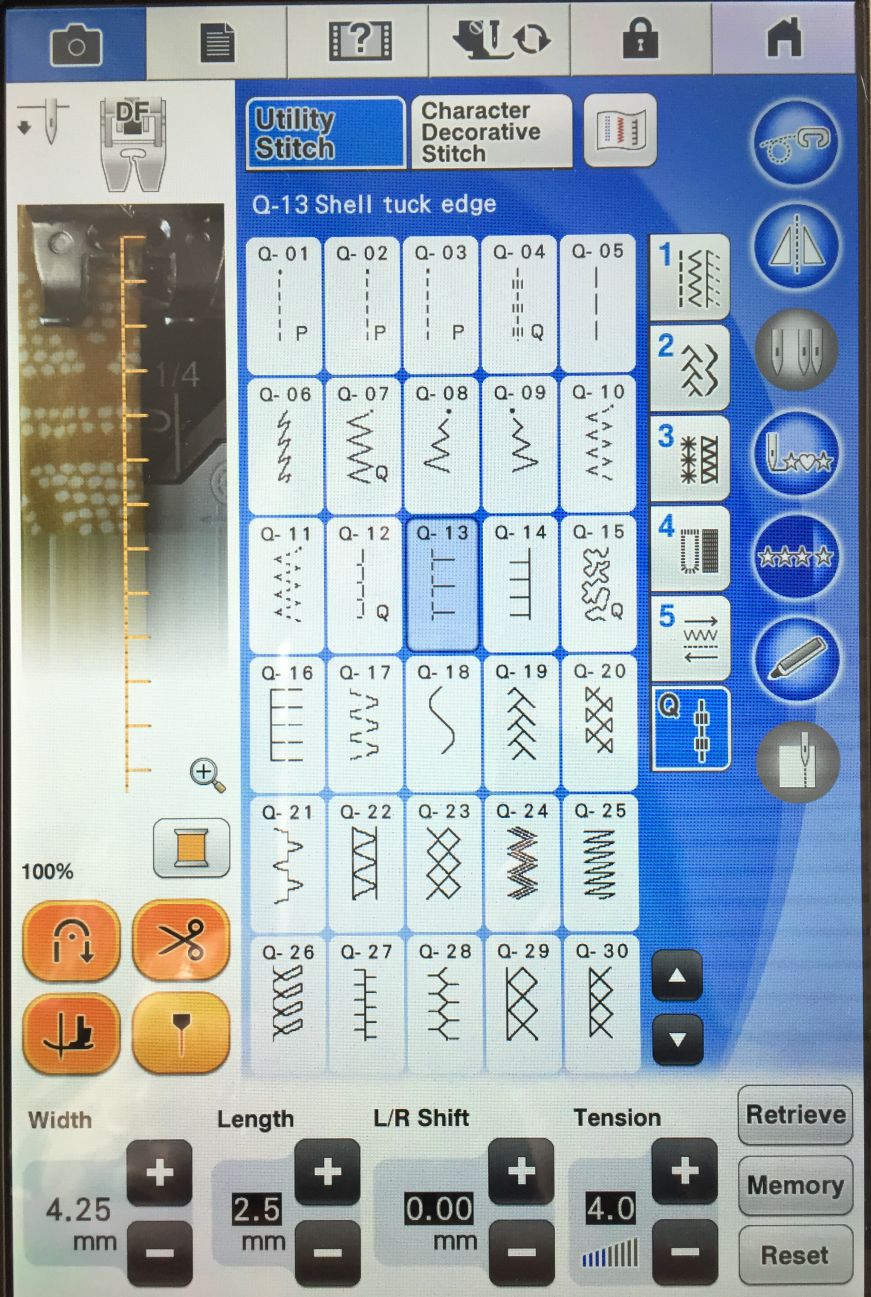
The next step is to set up the stitch on the machine. The picture below shows my Baby Lock Destiny's screen. The Shell Tuck Edge is stitch "Q-13" (highlighted in blue, below). It looks somewhat like a blanket stitch with three straight stitches between the right-swing jumps. Notice the width and length settings that I've adjusted to suit my knit fabric. Play around with your settings on scraps of your actual fabric and make adjustments to your liking. One more thing to note on the screen below: The Destiny has a built in camera that will allow you to view your actual fabric under the presser foot with a superimposed image of the chosen stitch, in actual size. This allows me to adjust my fabric precisely, and to see how the stitch will fall in place. Thank you, Baby Lock! You can see in the camera image that I am allowing the right-swing jump to fall off the folded edge of the fabric, with the stitch landing in the air. This is exactly what I want to happen because the thread will grab the fold and pull it over, creating a little scalloped edge! Note: this stitch is beautiful on woven cotton fabrics, too, especially when the fold is on the bias grain.

Beautiful, right? Imagine this stitch on other things. For example, how about on the folded edge of a 1.5" bias woven cotton strip for a beautiful piping insertion that would be wonderful slipped under a quilt binding edge!

With the first side of the front accent completed, fold the gown wrong sides together once again to expose the opposite side of the folded center tube. Repeat the Shell Tuck Edge for this side.
Continue to sew the little gown as directed in the pattern. I made a couple of changes to my version. First, instead of binding the neck edge, I folded the strips in half lengthwise and serged them to the neck edge with my Enlighten serger. (This serger threads itself, by the way!) This method is much faster and gives a nice smooth finish in one step.

The second change was to use the Shell Tuck Edge stitch on the lower hem, shown below, and sleeve edges as a finish.
I hope you'll give the Shell Tuck Edge stitch a try! I'm sure you'll find lots of places to apply it's delicate touch!
Thanks for visiting! Happy Sewing and God bless! Maxie
