Half Square Triangles the Easy, Accurate Way!

I need to make a lot of half square triangles. In a hurry. I'm working on a new video project that requires 88 of the little things, and I don't want to make them two at a time; I want to mass produce them. (The last quilt I made had 360 of them!) Triangulations to the rescue!

Triangulations for making half square triangles.

I found  Brenda Henning's Triangulations a few years ago, and have tried several other types of triangle papers, and these are by far my very favorite. Why? Let me count the ways:

  1. Because this is a CD with a pdf file of triangle papers in every size imaginable in 1/16" increments! Sizes range from 1/2" to 7 1/2". A pdf file means that you just open it and print it. There is no software program to figure out; simply scroll to the size you're looking for and click print! Hint: make sure 'actual size' or 'no scale' is chosen in your printer dialogue box.
  2. They are accurate! Every time! There's no way to miss this.
  3. The CD includes four quilt patterns...worth the $27.95 price alone.
  4. Another bonus: there are flying geese papers and quarter square triangle papers, too!
  5. You use regular computer printer paper; no need to purchase special paper piecing paper.
  6. You own the CD and can print as many papers as you need for life!
How to layer Triangulations and fabric.

So, here is a Triangulation paper for 3" finished triangles. I will make 8 units from this one sheet! Simply layer your two fabrics right side together and place the paper on top. Pin in place. Stitch on the dotted lines. In most cases you can continuously stitch around the grid.

Cutting the Triangulations apart.

After stitching, cut on the solid lines. I usually use a rotary cutter and ruler for this. Even the little 'dog ears' have solid lines so that you can cut them away. At this point, remove the papers easily by pinching the seam allowance at the center point and, with your other hand, swiftly popping the large triangle away in one quick tug.

Finished half square triangles.

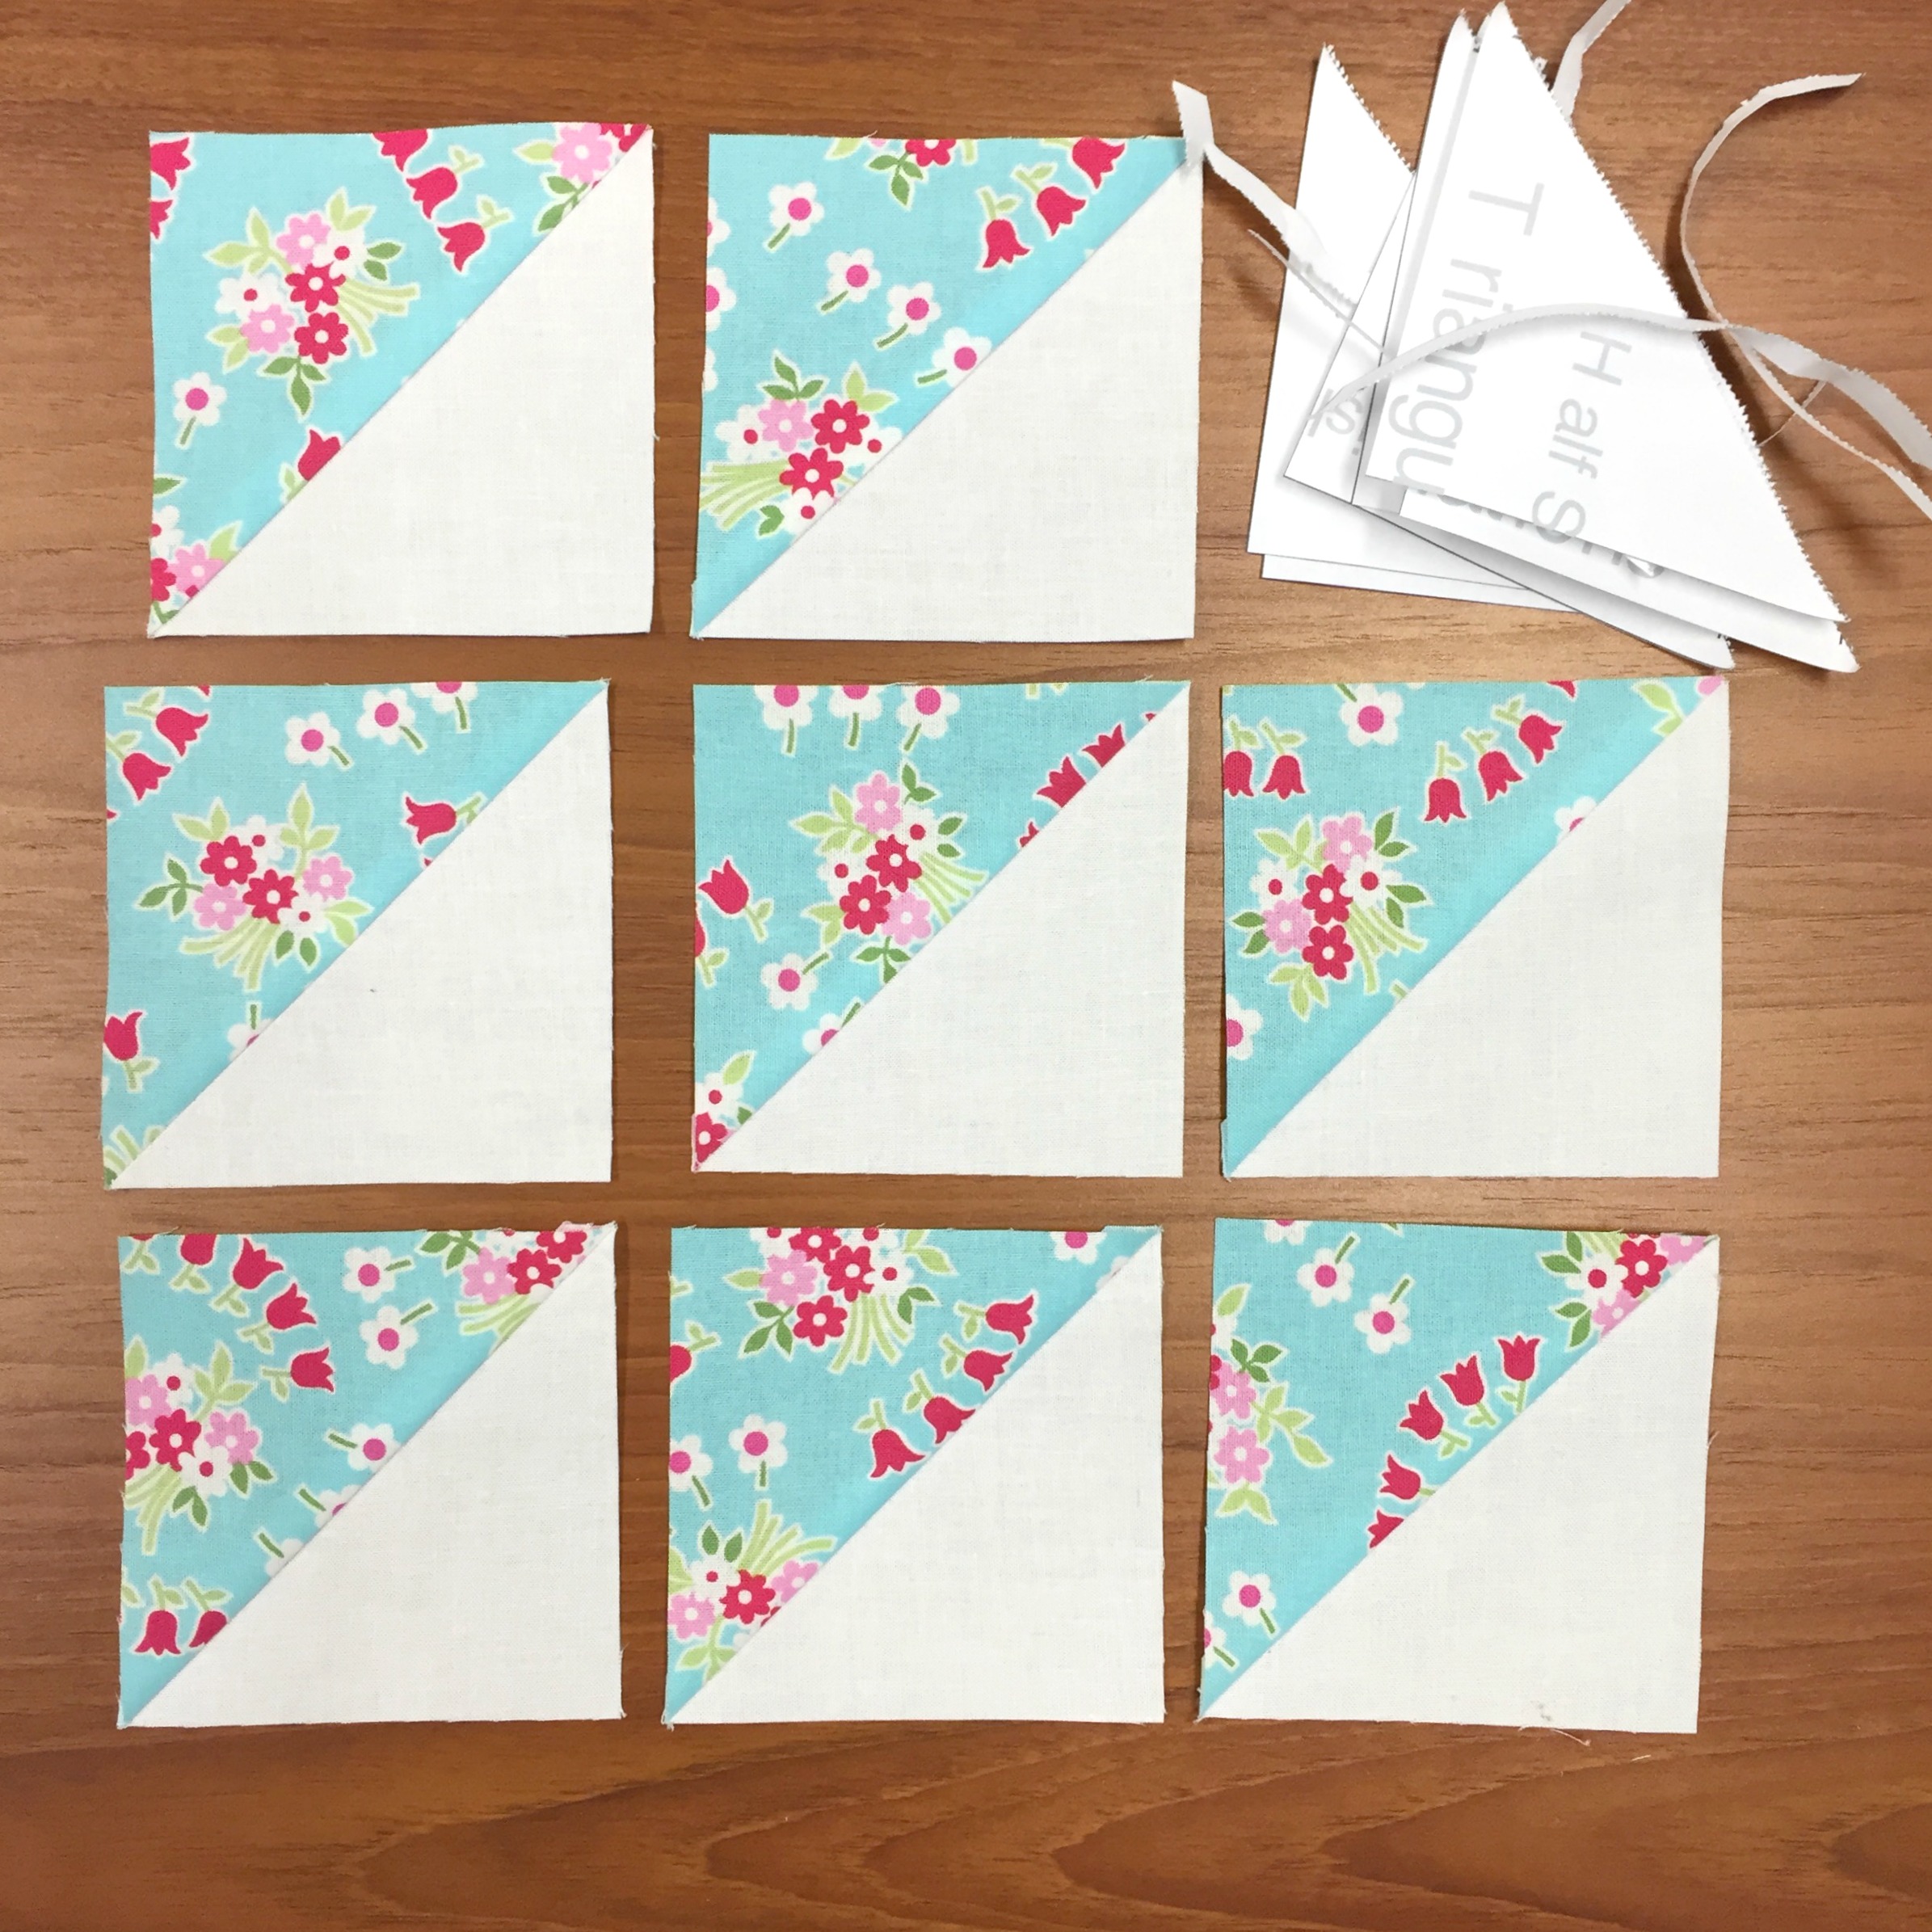
It took about 5 minutes to make these 8 half-square triangle units, measuring a perfect 3 1/2". Notice the 'dog ears' are trimmed away, and the diagonal seam travels perfectly from corner to corner (a very important thing). 8 down, 81 to go! Yes, you will find Triangulations on my shopping page.

Thanks for visiting! Be sure to share, pin, and leave me a comment so that I know you stopped by! Happy sewing and God bless, Maxie


Using Your Quilt Backing as Binding

Binding your quilt. Almost finished. Wish I was finished so I could start on another quilt. Shortcuts aren't always called for or even desirable, but sometimes, when they are befitting, they are so refreshing! So today, I'm going to show you a great shortcut for your quilt binding that works wonderfully on those quilts that won't be judged in a show, or passed down as a family heirloom. But for the quilts that are loved, used and washed, over and over again, it just makes sense.

The quilt I'm showing you is one that I made for my grandson, Bear, and you've watched the progress of it along the way. Now it's time to bind it! I'm going to simply use the backing as the binding. It's an easy technique, with just a simple little trick of a fold in order to miter the corners properly.

Trimming the batting and batting.

After quilting your quilt, trim the excess batting away. (Above left.) Applique scissors are very helpful for this and prevent accidentally cutting into your backing. Next, trim the backing away, using a rotary cutter and ruler edge placed 1" from the edge of the quilt. (Above right.) Trim all four sides.

Folding the quilt backing to use for binding.

Next, working with one side at a time, press the 1" backing edge in half. (Above left.) Press it in half again. (Above right.) Pin in place to the quilt.

Miter the corner of the quilt binding.

The corner fold is very important to your finished outcome, and it's very simple. In the left photo (above), the right side of the binding has been pressed over twice and pinned in place to the quilt. The top edge has not been pressed. Fold the top edge over so that the folded edge is in line with the quilt edge. The white dashed line indicates the fold you need to make. Press well to hold it in place. You will make one more fold (above right), to bring the raw edge of the backing to the edge of the quilt. The white dashed line in this photo indicates this second fold. Press well.

mitered quilt binding using the backing

Fold the edge over onto the quilt, and the corner will be perfectly mitered! Pin in place. Repeat for the remaining three corners.

Machine stitching quilt binding.

Stitch very close to the edge of the binding, removing pins as you stitch. A walking foot is very helpful for this step. (Above left.) Just look how nice! Now, give it! (Yes, Bear did love it!)

Bear loves his quilt.

Thanks for visiting! Happy sewing and God bless! Maxie

Accessorize with Hello, Bear Art Prints!

We waited with bated breath for the arrival of Bonnie Christine's newest fabric line, Hello, Bear to arrive at our quilt shop. When it finally arrived we were perfectly enchanted! Filled with sweet faced woodland creatures and forest elements, each bolt evokes a childhood adventure to be had right in your little one's own bedroom!

Sweet enough on it's own, the nursery, playroom or bedroom can be even sweeter with Bonnie's coordinating art prints for Hello, Bear! I'll give you a peek below, but you can see more at Bonnie's Etsy Shop, (there's even a set of woodland masks!)  and read more about them on her blog, Going Home to Roost. Oh, and there are wall stencils in the works, too! Did you know you can find coordinating wall stencils for many of Bonnie's fabrics at Royal Design Studio? Watch for Hello, Bear Stencils soon!

set2.png

By the way, I'm sure you know that I'm blessed to be Bonnie's mother, and did you know that Hello, Bear celebrates the birth of my grandson, Bear?


Thanks for visiting! Happy Sewing and God bless! Maxie

AGF Stitched with Kimberly Blog Hop!

I'm so happy to finally be able to share what I've been working on for weeks! You've seen snippets on Instagram and Facebook, but today you'll see the completed project! In fact, you'll see lots of completed projects! My quilt is pictured below, but let me back up a little bit and fill you in on the details.


Art Gallery Fabrics and Kimberly of Fat Quarter Shop are collaborating together to bring a series of projects to you on a regular basis. Not only will this partnership bring you a great quilt made from Art Gallery Fabrics, but it will include a blog hop featuring several bloggers that whip up their own version of the same project...all made with their chosen Art Gallery fabrics.  When I was asked to join this first AGF Stitched with Kimberly Blog Hop, I was thrilled to hear their first collaboration would feature Bonnie Christine's newest fabric line for Art Gallery, Hello, Bear! As Bonnie's Mom, you know that I was all in!  You'll see Kimberly's beautiful Birchen Quilt at Fat Quarter Shop's blog, and you can download the pattern for free! Kimberly also made a video tutorial to show how to make the two quilt blocks:

Fat Quarter Shop is offering a kit for sale using Hello, Bear, which is pictured behind Kimberly in the video, and is featured on the downloadable pattern.

My version of the Birchen quilt features another of Bonnie Christine's fabrics, Winged. I made the block according to their directions, but, after playing with it a bit in my EQ7 software, I settled on a different block arrangement. I also kept my teal/coral fabric placements the same in both blocks.


There were half square triangles...lots of them...but we all used Triangles on a Roll, (shown in Kimberly's video) which made fast work of them!

After stitching the half square triangle units into rows, the rows are sewn together. Pressing was made easy by using one of my very favorite pressing tools: the Strip Stick! This little jewel elevates the seam allowance so that other pressed seams aren't disturbed!

I hope you enjoy hopping from blog to blog to see how we all have interpreted the Birchen Quilt! Happy Sewing and God Bless! Maxie


Pattern Weights

No matter what your sewing style, garments or quilts or bags or any other type of sewing activity, you're sure to love using pattern weights! Pinning can be time consuming when cutting out pattern pieces, and totally unnecessary when you have pattern weights! I was gifted with these handmade weights from two fellow sewists! The little green ones, pictured left, are filled with rice. Sarah Overton made them for me for Christmas and I just love them. Instructions are found at Tea Rose Home's blog. The larger, square weights were made for me, also for Christmas, by Ann Johnson. You can find a great tutorial on Zaaberry's blog. I love them both, and use them together on larger pattern pieces. So, make a set for yourself and a set to give to a sewing friend!

Thanks for visiting! Happy Sewing and God bless, Maxie