
I promise 'Y Seams' are easy. Not sure what a 'Y Seam' is? Just as the name implies, it is three seams that come together at one point and form the shape of the letter 'Y'. Dissect a Y and you have three lines. Stitching such a seam is really very easy, but most quilters avoid doing so because they don't understand the construction or they think it might be too time consuming. Let's dispel those fears! I made the hexagon quilt below, and every seam is a 'Y Seam'! (Free pattern by Bonnie Christine and Maxie Makes!) Kit with precut hexies here.

This quilt really went together pretty fast, because there are no blocks to piece, and only simple seams to sew the hexies together. The picture below is a quilt unit from my current project that includes several 'Y Seams'. (At the end of this post is a link to the designer's website, where you'll find great construction tips and the free pattern for the quilt!)
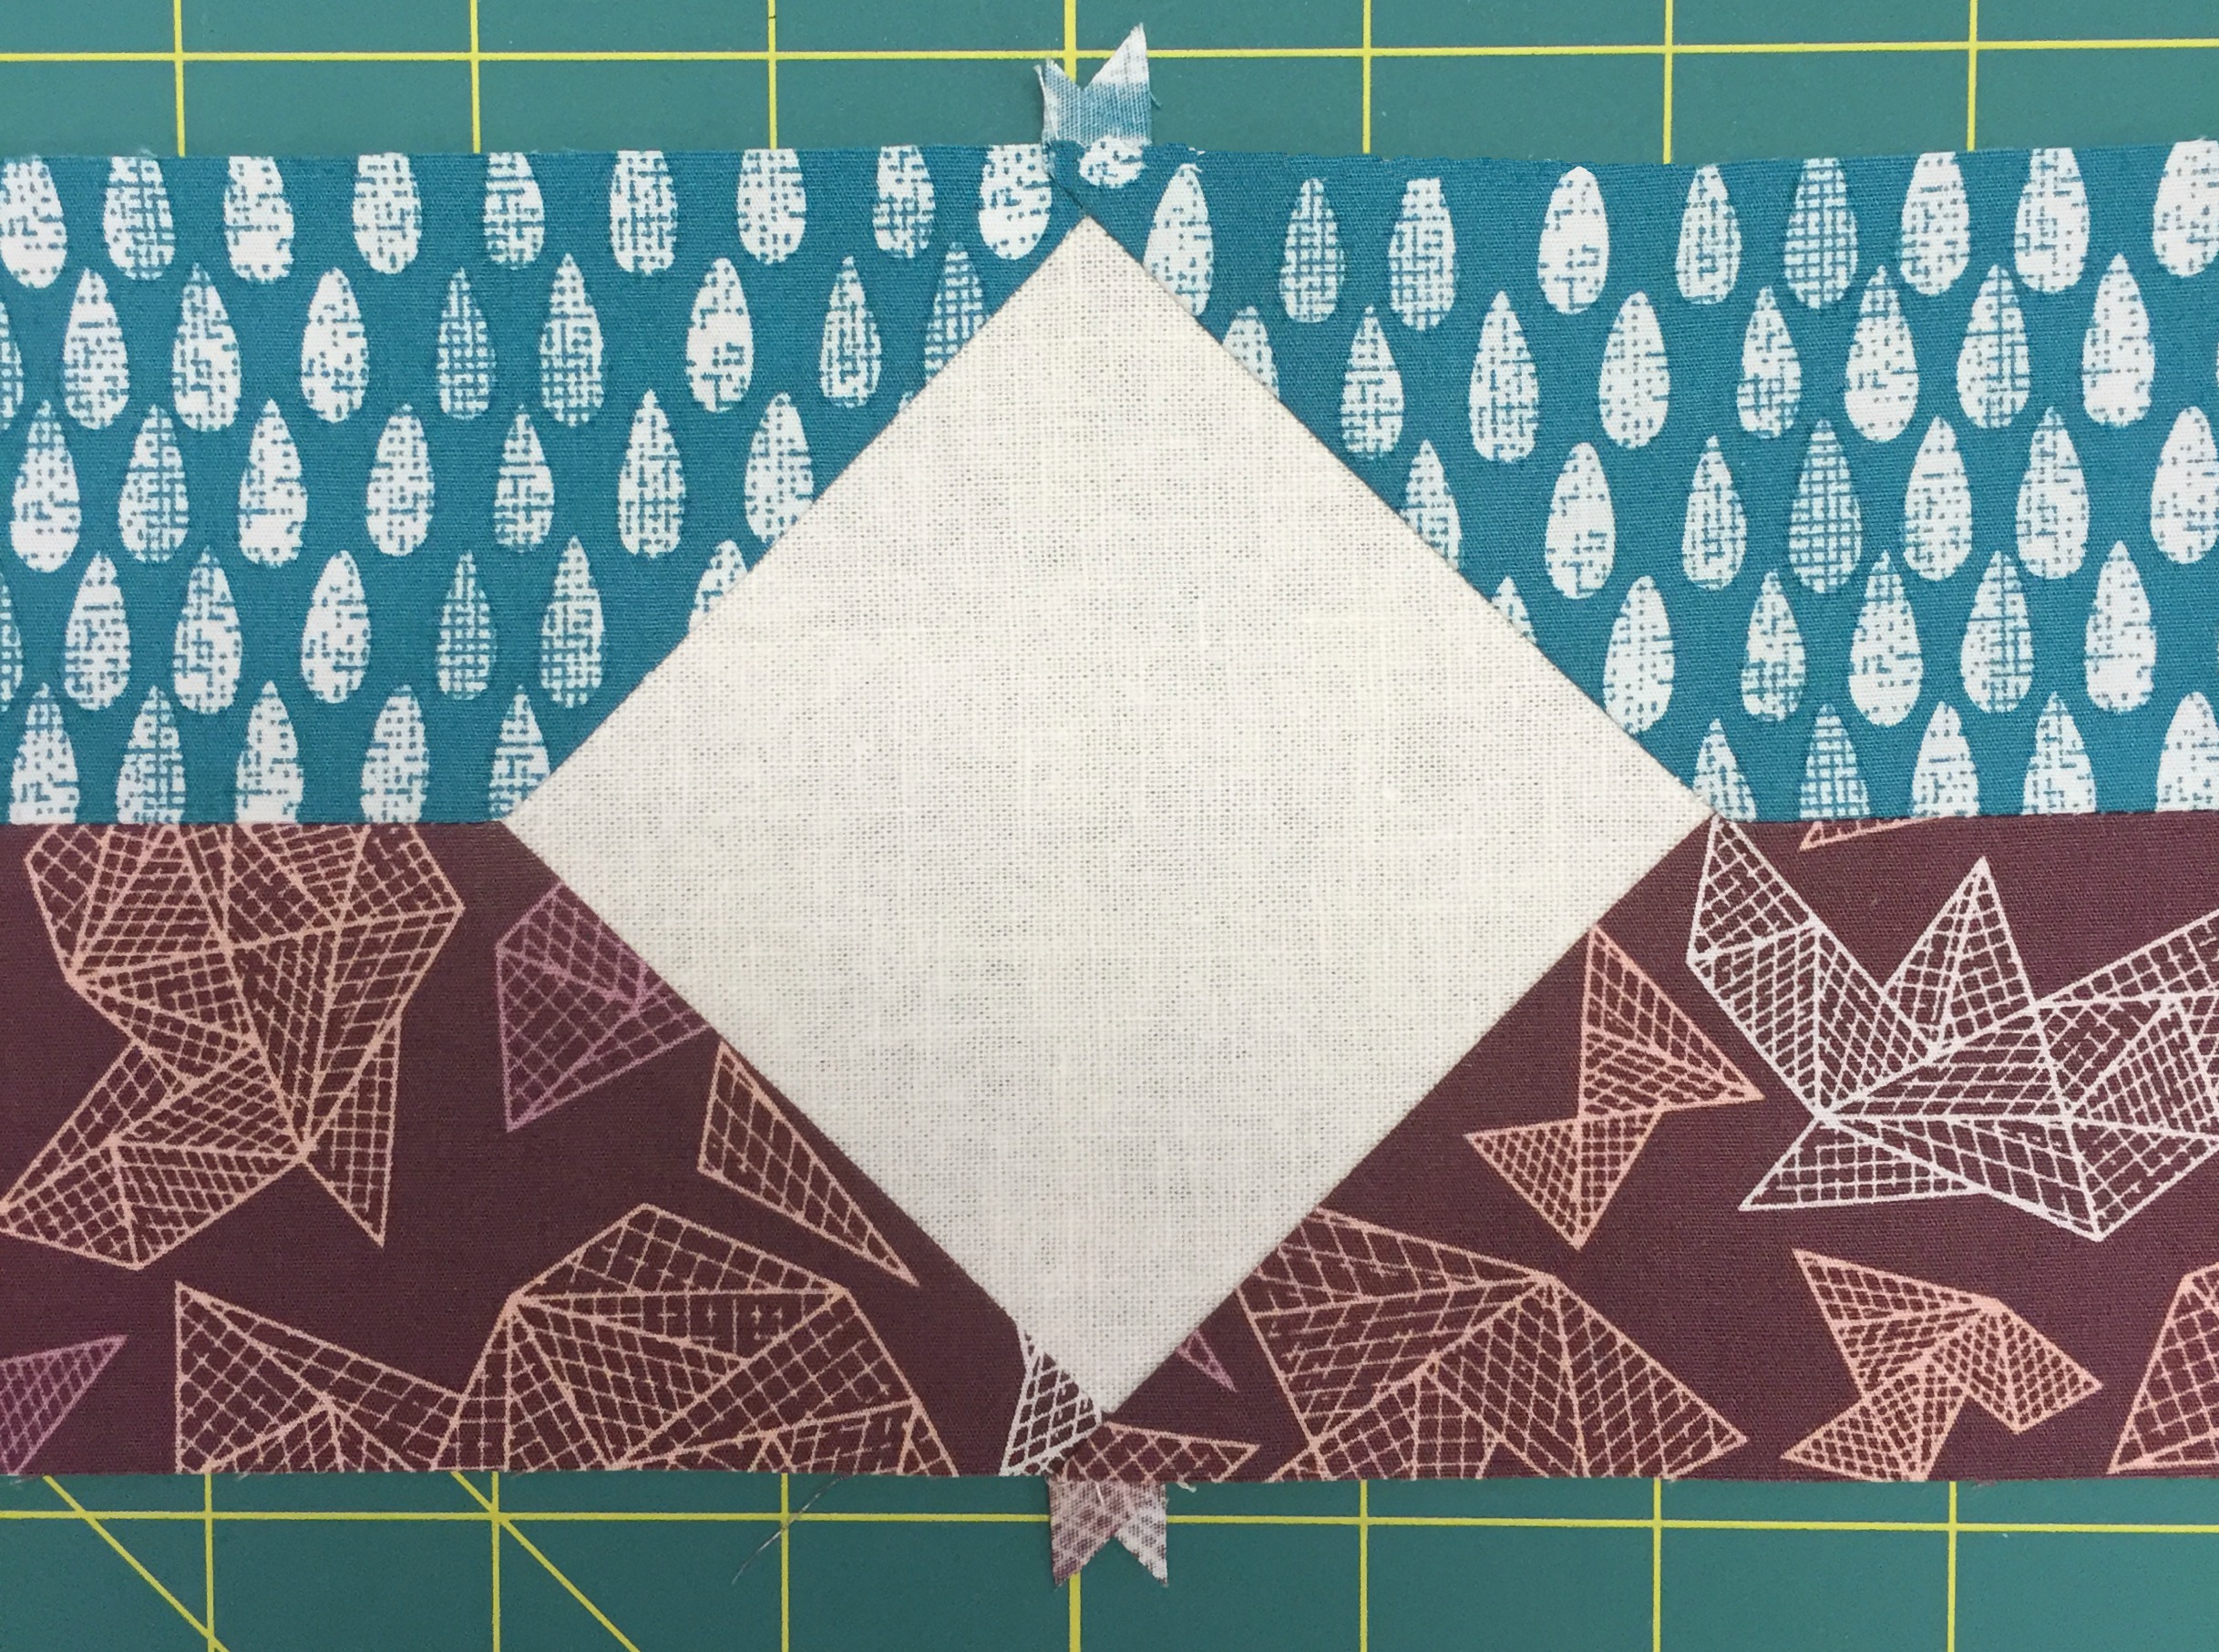
So, you see above two fabric strips that have a linen square sewn between them, in the seam. When I first saw the picture of this quilt on The Purl Bee's blog, I thought the squares were applique´d in place. Ah, no, those are all 'Y Seams'. Ok! The first step is to cut the ends of each of the four strips at 45º angles. The Purl Bee's blog shows how to prepare these strips. They are then sewn together, forming the first seam of the 'Y'.
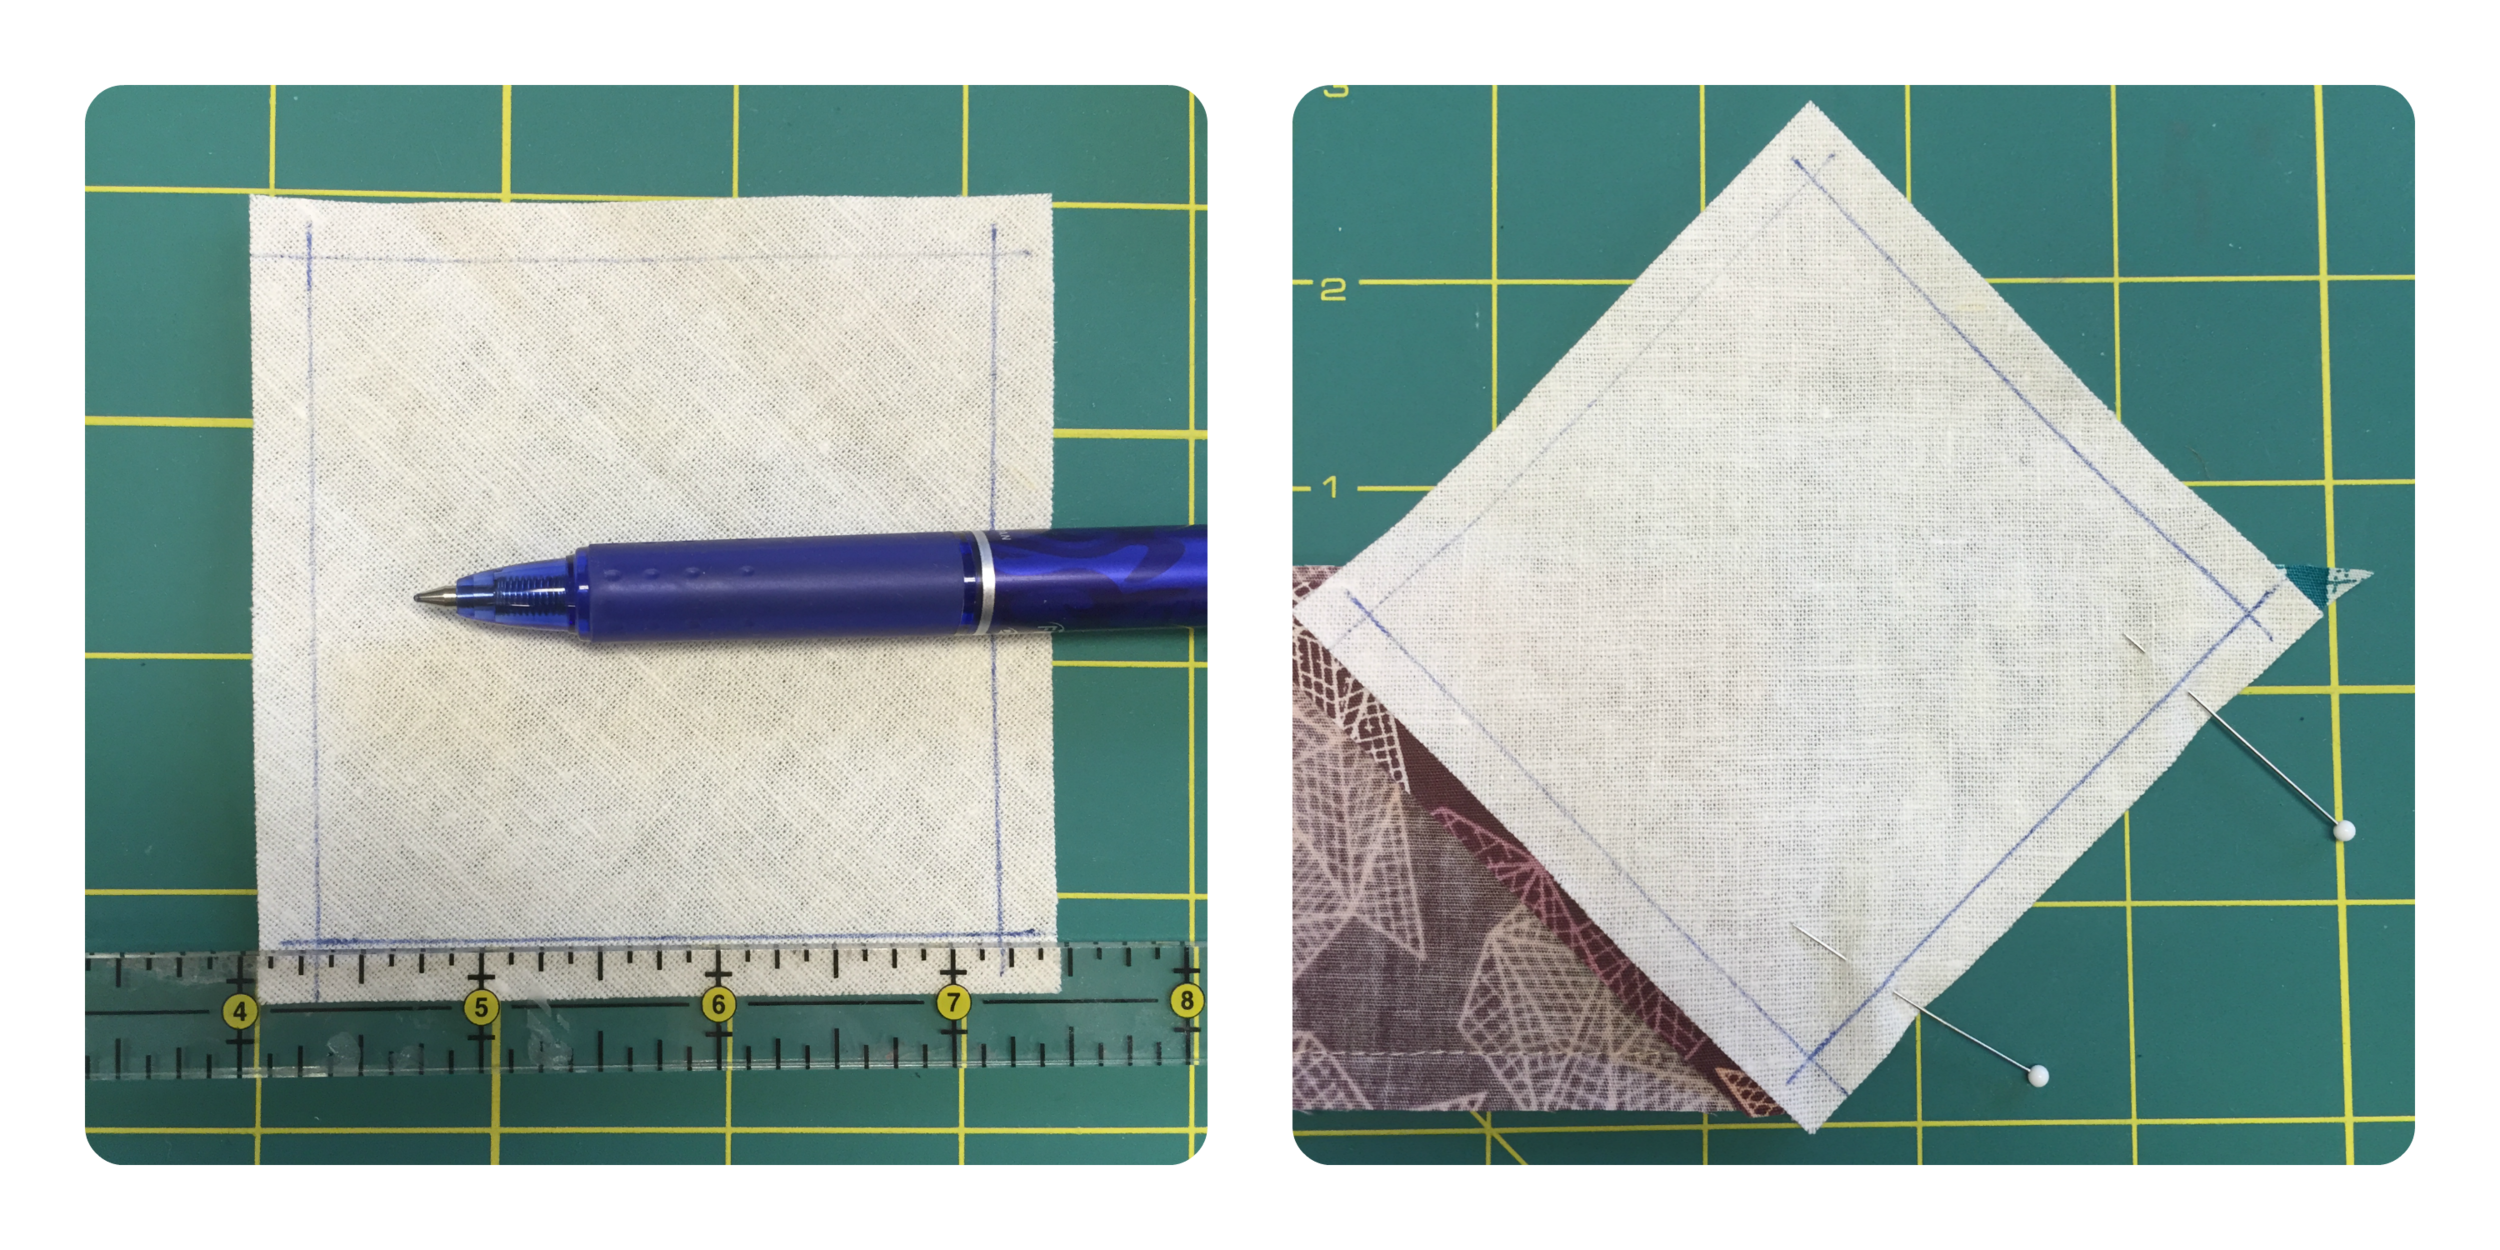
- The photo on the left shows the 1/4" seam allowance drawn on all four sides of the square that will be sewn into the 'Y seam'. I used an iron-off marker, but this is really like training wheels on a bike. You can draw them on a few, but in no time at all you'll understand how the seam is constructed and you'll abandon the pen.
- Pin in place and stitch the seam, beginning and ending where your lines intersect. Be sure to secure the stitching at the beginning and ending of the seam. Tip: for a perfectly flat seam, stop just prior to reaching the intersection, just about the distance of one stitch length. Likewise, when you begin the seam, move just one stitch length away from the intersecting lines.

- Remove the pieces of fabric from your machine. Line up the raw edges of the fabrics for the other seam. To do so, you'll need to fold your previously sewn seam out of the way.
- This laser guidebeam sure comes in handy when sewing across lines, especially imaginary lines! (Thank you, Baby Lock!) Another good excuse to ditch the marking pen! Stitch from point to point and press your seams so that everything is nice and flat!

This little quilt will be my version of the Agate Quilt from The Purl Bee. I'll share more of my quilt in a few days...it must be ready for Spring Quilt Market in less than 2 weeks!
Thanks for visiting! Now let's show those 'Y Seams' that we have no fear! Happy Sewing and God bless! Maxie
