
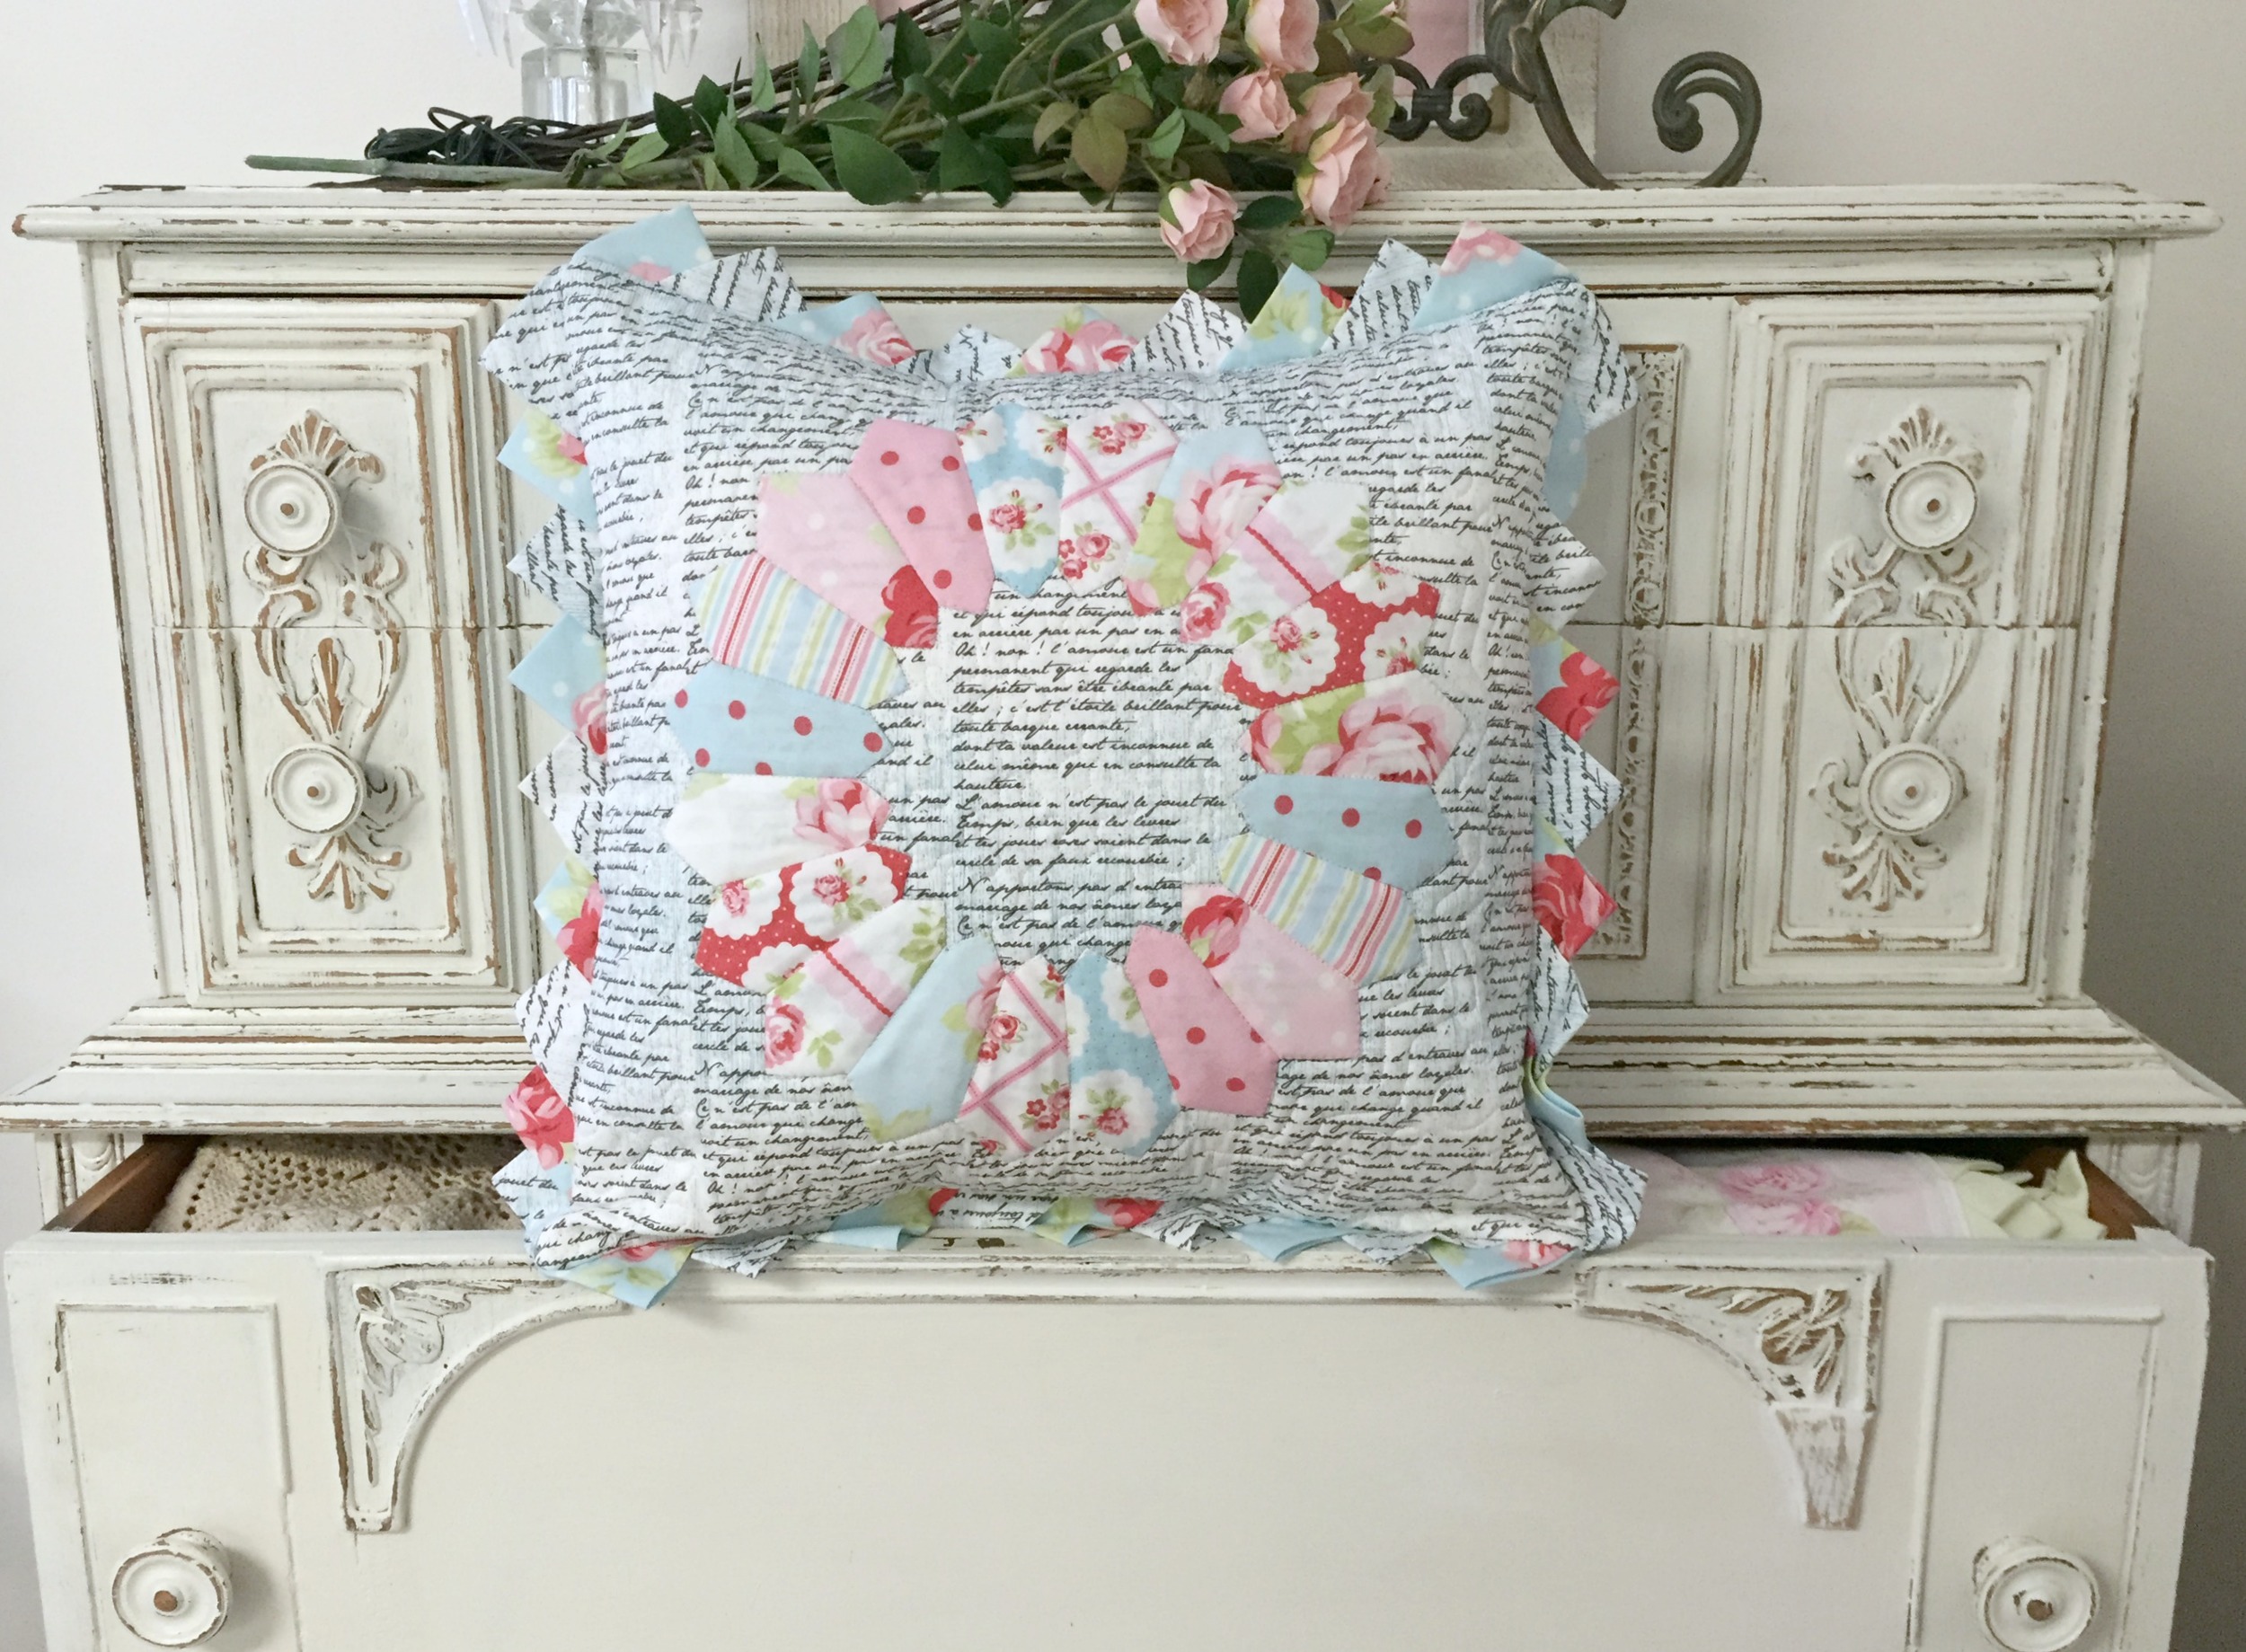
I'm loving Dresden Plate quilts these days! I attended International Quilt Market last week and it seems that I'm not the only one enamored by the design! I especially loved the double pointed Dresden designs from Susan Cleveland of Pieces be With You. So, I came home and adapted the design for a pillow.
Using an 18º Dresden ruler, I cut twenty 4" wedges. Make both ends of the wedges pointed and sew them all together as follows:
- Fold a wedge in half lengthwise, right sides together.
- With a 1/4" seam allowance, stitch straight across each of the narrow ends. Finger press the seams open, with the tiny triangle at the tip laying flat. Turn right side out, using a point turner to get a nice point at each end. Press well.
- Arrange wedges to your liking. Using a 1/4" seam allowance, sew five Dresden wedges together. Press well. Lay the 5 piece section on a gridded rotary mat to make sure it is nice and square. The raw edges will extend 1/4" over grid lines, but make sure it's square and flat. If not, adjust seam allowances and restitch.
- Construct four sections in this manner and then sew them all together to create the circular Dresden Plate.
Applique´ the Dresden Plate to a 16" square of background fabric. See last Friday's post for instructions and a video on the stitching the applique´. To center, press the square in half vertically and then again horizontally to form crease lines. Line up the crease lines with opposing seams in the Dresden plate, as shown below. Pin in place, then stitch.

Layer the 16" Dresden plate block with batting and backing and quilt as desired. I stitched in the ditch around the Dresden Plate, and then echo quilted around the outside tips twice. (See photo, below, right.) I finished the remaining portions with a loop meander to create texture.
The photo on the left shows how great Baby Lock's Free Motion Echo Quilt foot works for applique´with the feed dogs raised (see last Friday's post), and the photo on the right shows how great it works for echo quilting with the feed dogs dropped! This foot has many registration marks to help you keep your stitches just where you want them. Use it with the pivot feature and the needle placement feature engaged for stressless sewing!

After quilting, I made prairie points from 3 1/2" squares. Nine (9) points fit perfectly on each side, requiring a total of 36 points. You'll find a wonderful article on McCall's Quilting website on how to make prairie points and how to nest them. Pin, then baste them in place around the outer edge of the pillow top. If you'd like to make continuous prairie points from one fabric, I'll refer you to my blog post for those instructions and my video tutorial here.

To make an envelope pillow back, cut a 16" length of 44" wide fabric. Cut on the fold to make two pieces 16" wide x about 22" long. Remove the selvage edge. Press each piece in half along the 16" width, as shown below in the first photo. (Click on the photo to enlarge it.)
Place one piece of backing fabric on the pillow, right sides together, with the raw edges lining up with the outside raw edges of the pillow. (Center photo.) Place the remaining backing piece on top of everything, again aligning the raw edges. The folded edges of the backing will overlap each other by about 4 or 5 inches. (Right photo.)
Stitch around the entire pillow, about 1/4" seam allowance, making sure to have all the raw edges of the prairie points enclosed in the seam allowance.
Turn your pillow right side out. Use a point turner for the corners and press well.
For the inside pillow, I purchased a pre-made 16" pillow form. Insert through the opening in the back of the pillow. Enjoy!
