Machine Embroidery, Sweets for the Sweet!

I've been a fan of Evy Hawkins' work for a while. You may be familiar with her beautiful Sashiko techniques, or her monograms and embroidery designs, or her machine cutwork (she teaches a Machine Embroidered Cutwork Class on Craftsy). Her website is a wonderland of delicately beautiful needlework, ranging from quilting to hand embroidery. It's packed with projects, tutorials and inspiration, so brew a cup of tea and have a visit with Evy!

Baby Deer Embroidery Design by Evy Hawkins

When I first saw her Baby Deer embroidery designs I knew I had to make something for my new granddaughter, Ollie Doe! I could hardly wait for the 5 second download to complete. By the way, she offers this for both hand and machine embroiderers.

Baby Lock Destiny Sewing and Embroidery Machine
Baby Deer by Evy Hawkins (abitofstitch.com)

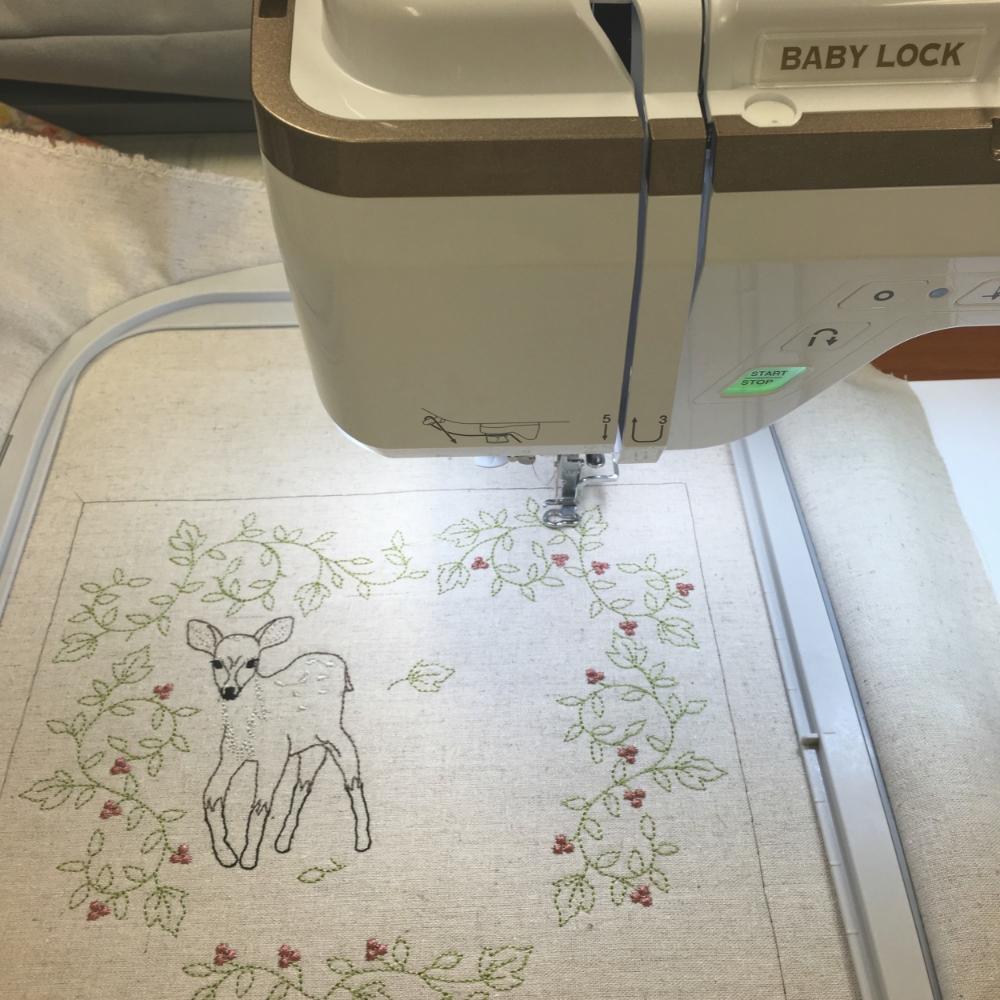
My Baby Lock Destiny stitched it out perfectly! Tip: My machine has an optional basting feature, which adds a basting stitch around the design, spaced perfectly around four sides. Before removing the stitches, I used them to square up the embroidery piece perfectly! I simply measured 1" off the stitching line and trimmed. See photo below. Ready for the borders!

Using the basting stitching line as a guide for trimming.

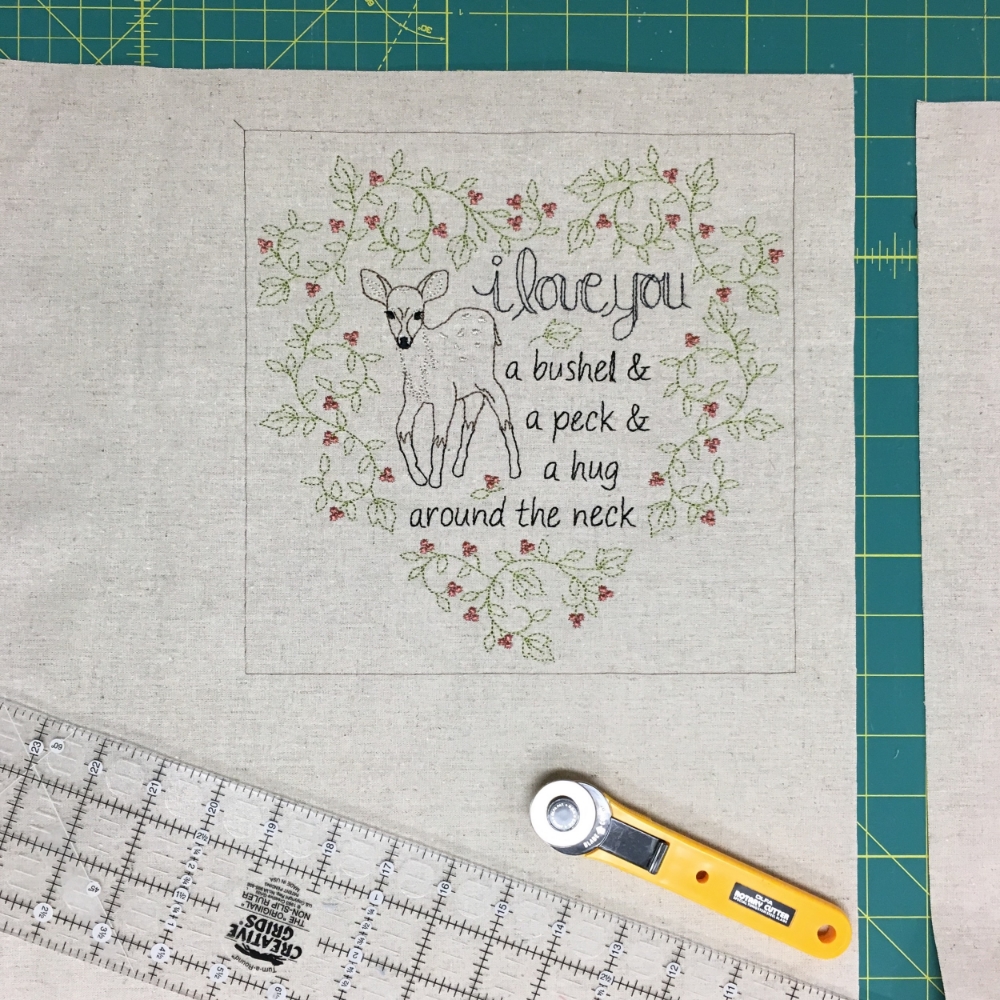
I added 3" borders of pink check printed linen and piping and it was ready for little Ollie's visit in no time! Thanks, Evy, for your beautiful work!

And thank you for visiting! Happy Sewing and God bless. Maxie

Put Your Best Foot Forward!

When we sew, sometimes using the right tool can mean the difference between homemade and handmade. I prefer handmade, but I'm no stranger to homemade! I've been sewing for a long time and I've paid my homemade dues, and that's one reason why I love to share things that make our sewing easier and, at the same time, offer a more professional finish. Today I want to share one of my very favorite and most useful presser feet, the Edge Joining Foot. This foot isn't likely in your accessory box because it is usually an option. Looking a bit like the blind hem foot, you might inadvertently think you have it, but upon inspection you'll notice the difference. Below is a shot of my foot as I sew in the ditch (seam) of this placket on a robe I made for my mother. With a small needle and a 60 wt. cotton thread, the stitching is virtually invisible. Show off!

Using the Edge Stitching Foot.

Pictured below are both the blind hem foot (left) and the Edge Joining Foot (right). Notice that the blind hem foot's center guide has a curve in it that wraps around the needle. The center guide on the Edge Joining Foot doesn't even extend into the needle area, allowing the needle to sew at any position you choose. Keeping your needle in the center position, as in the picture above, allows you to stitch perfectly in the ditch because the blade will guide your fabric. If you want to stitch on either side of the ditch, just move your needle into a right or left position. The blade will still remain in the ditch, but the needle will impeccably stitch the perfect distance from the ditch! Show off!

I use the Edge Joining Foot to sew many of my quilt bindings. The blade keeps your stitching line uniform on the binding's folded edge. You can see all four edges of this quilt's binding in the photo below (two sides show the front and two show the back). Show off!

Machine Sewn Quilt Binding with the Edge Sewing Foot

There is so much more that this little jewel of a foot can do for you, making you look like the best sewist ever!

  • Sewing edges of laces, trims or ribbons together.
  • Topstitching any edge (bindings, purse handles, etc.)
  • Sewing pockets into totes or clothing.
  • Sewing applique´edges in place.
  • Fagotting two folded edges together with a decorative stitch.
  • And more!

Do you have your Edge Joining Foot yet? Let's get out there and show off!

Thanks for visiting! Happy Sewing and God bless! Maxie

Â