
So...we have been remodeling our home and I've been enjoying some DIY projects here and there. This one came from a gift from my husband. A little back story first...
We took almost 2 years to complete our little space, and the bedroom was practically the last thing on the list. We ran out of hardwood, so I had to settle for carpet. I researched my options and, for several reasons, landed on an organic wool from a wonderful company in Dalton, Ga., Earth Weave. They list on their website the many benefits from wool...did you know that it actually purifies the air? It was a splurge, but after all, my room was small. We planned the budget and decided to go for it! Installation day came, and it was as lovely and soft as I had hoped it would be. But it smelled of, well, sheep! Ok, a barn full of sheep. Wet sheep.
I figured the smell would dissipate, and it eventually did. But not until my husband had plenty of opportunities to tease me. One day he smuggled in a very old, framed canvas photo of sheep in a pasture and hung it in the room. He thought it was very funny, but I actually loved the picture so much that I decided to preserve it and make it mine by adding a sweet verse!

The scripture verse is not painted on the picture, but is vinyl that I cut with my Silhouette Cameo machine. The font was created by my daughter, Bonnie Christine, in her own handwriting! The Silhouette Design Studio software is so easy to use that it made the whole process fast and easy!
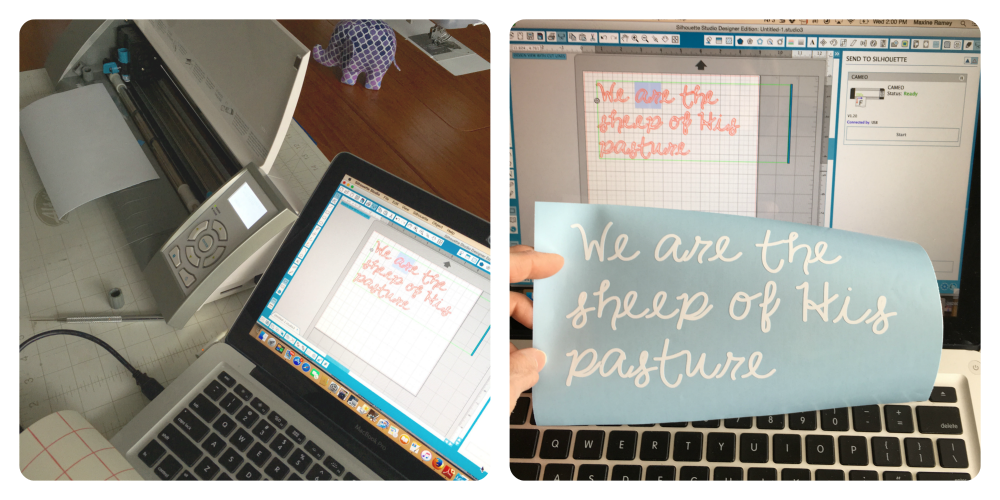
I love that this font is Bonnie's handwriting. One day we were playing around with an IPad app that creates fonts from handwriting. She just whipped out A-Z and I saved it to my computer. Since the Silhouette automatically imports all the fonts on my computer into the Design Software, Bonnie's Handwriting was right there, ready to use!

I cut the words apart so that I would be able to place them exactly as I wanted them on the picture.

When transferring a vinyl decal, the first step is to place a piece of vinyl transfer paper over the top of the design. The red grid lines make it easy to keep things nice and straight. (First photo.) Simply peel it off it's backing, place it over the vinyl lettering and rub to transfer the letters to the grid transfer sheet. (Middle photo.) Peel up the transfer sheet and it's ready to set in place. (Third photo.)
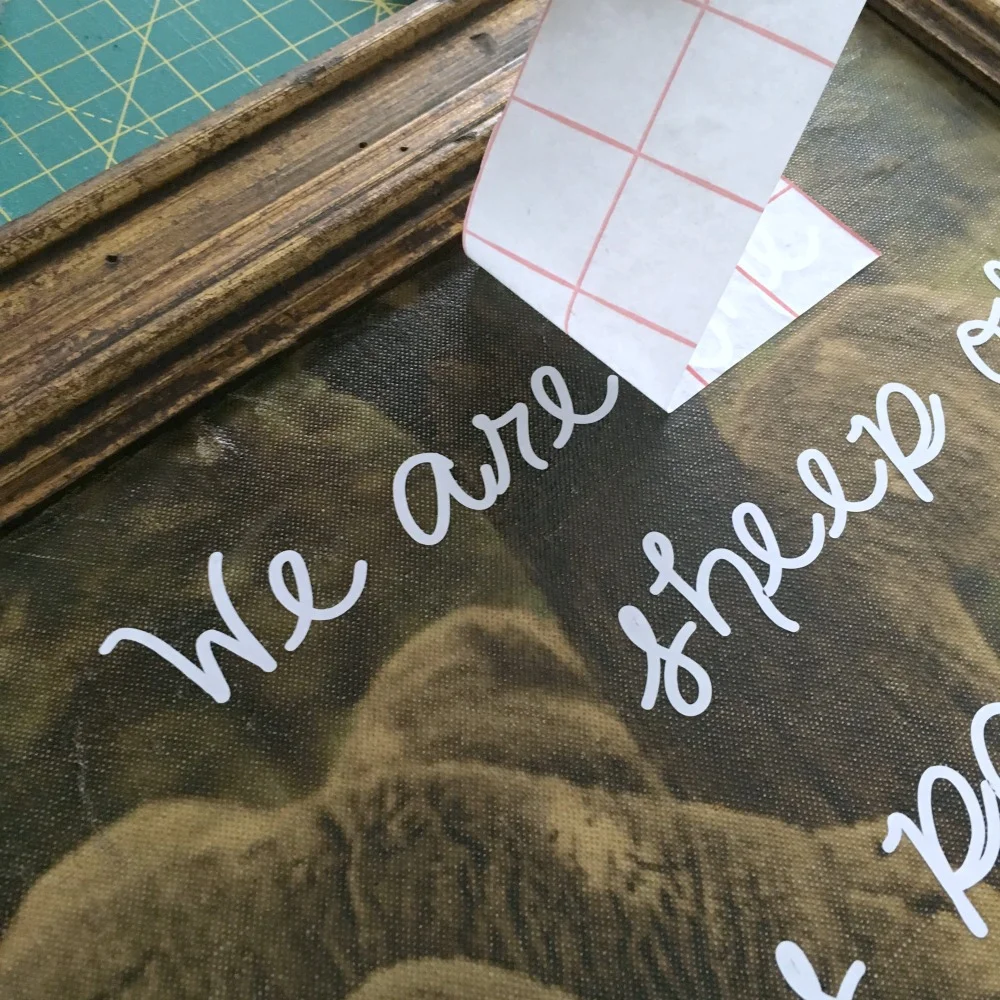
Place the transfer sheet in position and rub to transfer the lettering to the surface. It's as easy as that! And did you know that Bonnie also designs files for Silhouette? Check them out here! They coordinate with her fabric lines, but can be used for anything you can dream up! I have another DIY project in my head using one of her designs, so I'll be sure to share that with you soon!
And after it's all said and done, I love my wool carpet!

Thanks for visiting! Happy sewing (or cutting) and God bless! Maxie
